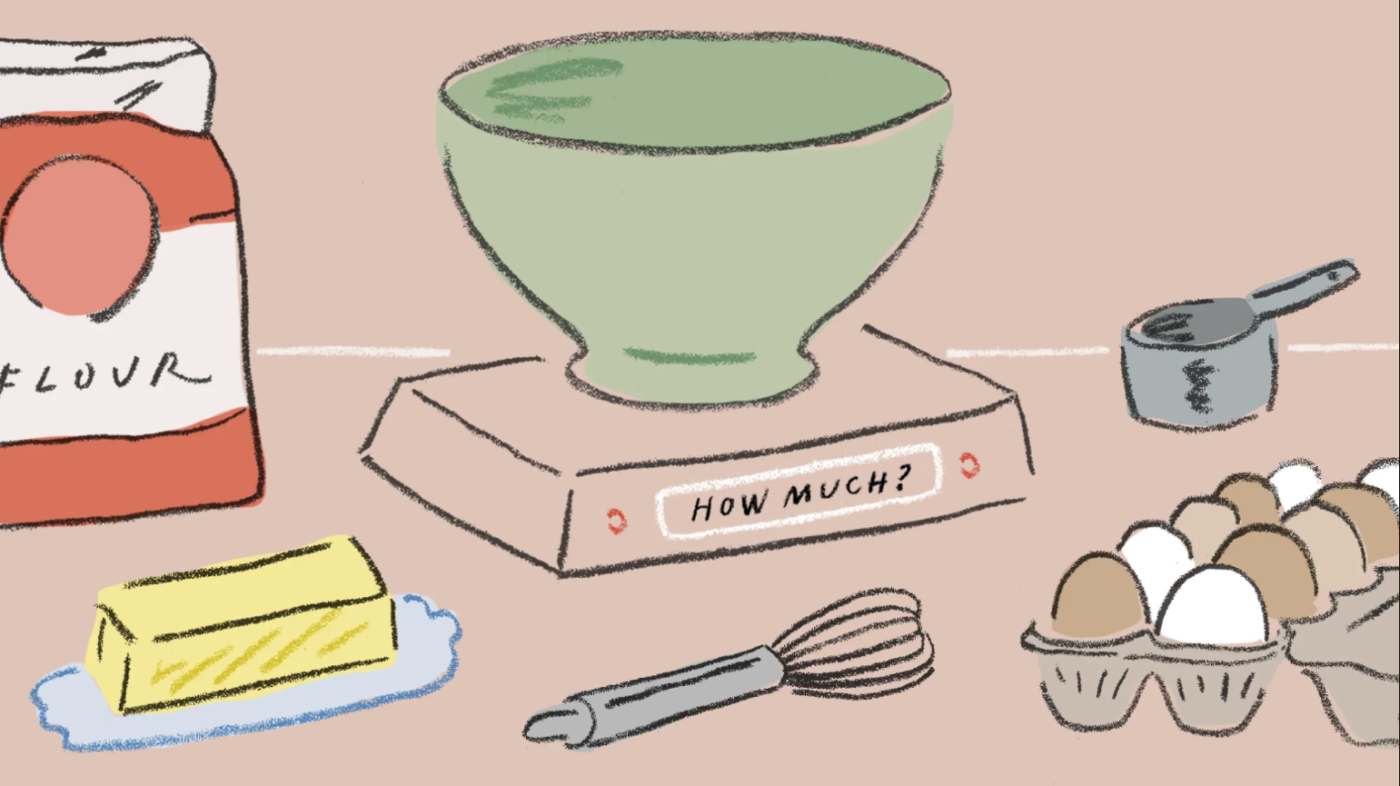
Now is the time of the year when autumn adjourns, and we all want to postpone the start of winter. This time comes with the inevitable boredom and stir-crazy nature of the Minnesota winter. Undeniably, the fact is that we will all be spending a lot more time indoors. It is now the perfect time to try out some warm winter desserts.
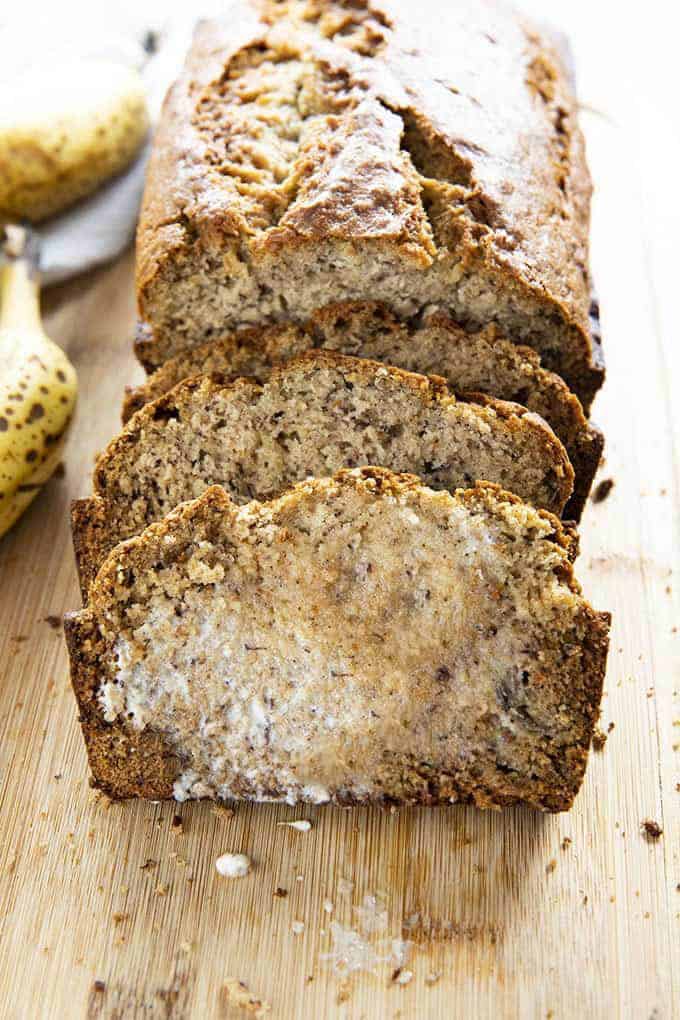
Hello! Do you like to bake? If so, this is the perfect banana bread recipe, compliments of the Salty Marshmallow! Always remember to use ripe bananas. You can tell because they will start to get brown and mushy. This recipe can ensure a moist and fresh tasting bread. Enjoy!
Hello! Do you like to bake? If so, this is the perfect banana bread recipe, compliments of the Salty Marshmallow! Always remember to use ripe bananas. You can tell because they will start to get brown and mushy. This recipe can ensure a moist and fresh tasting bread. Enjoy!
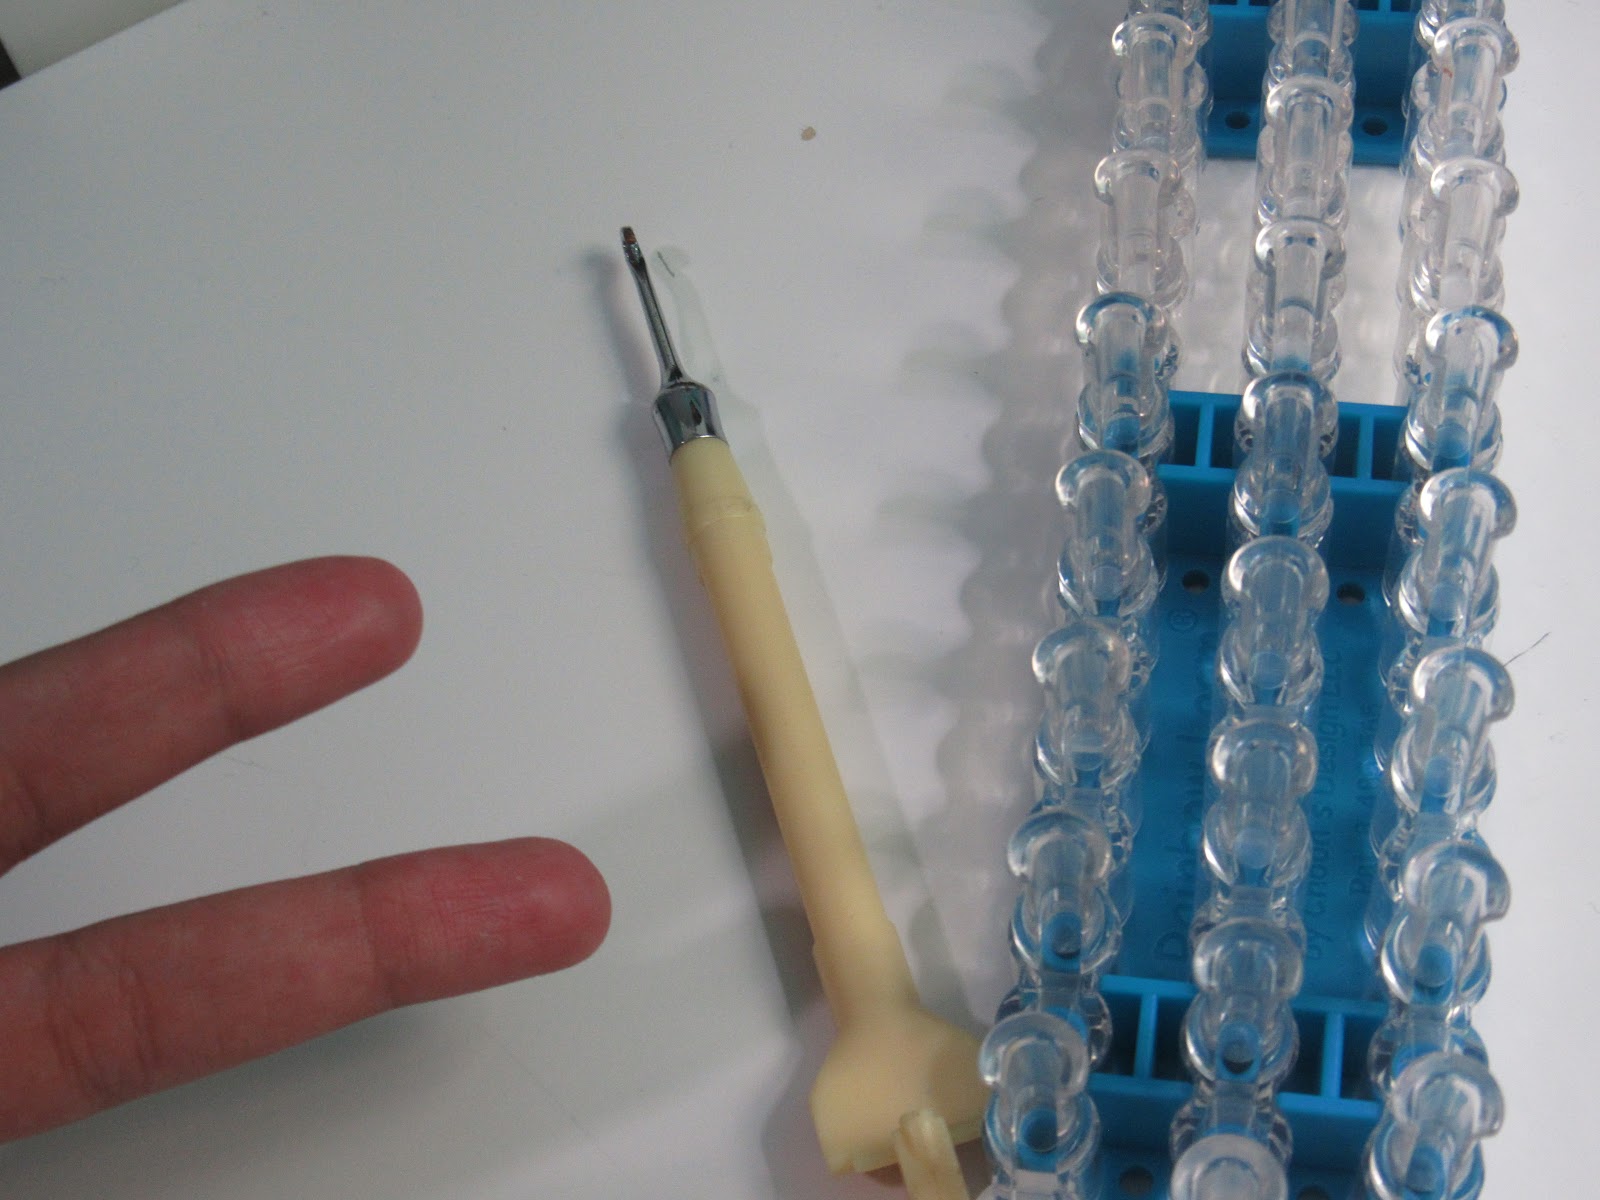
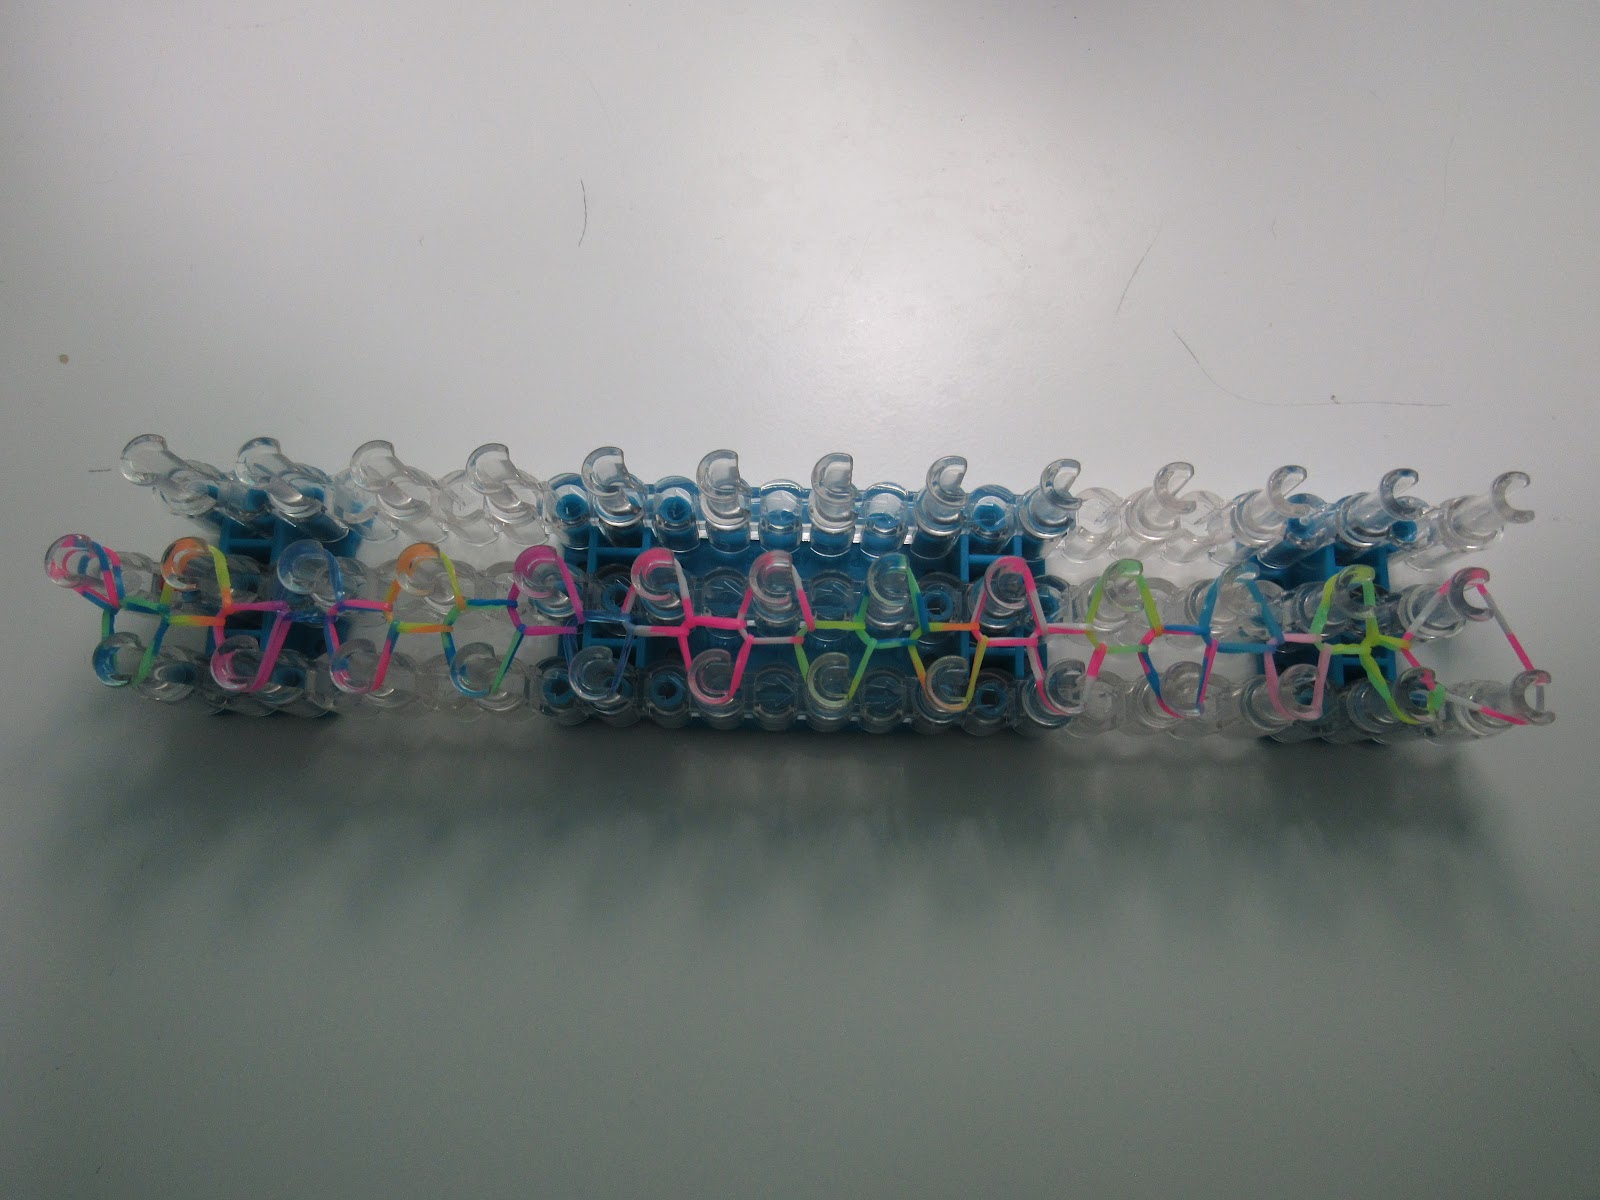
Hello, welcome to another article in the “DIY Rainbow Loom” series. I will be teaching you how to make a triple single bracelet. Make sure to have all your usual materials at hand!
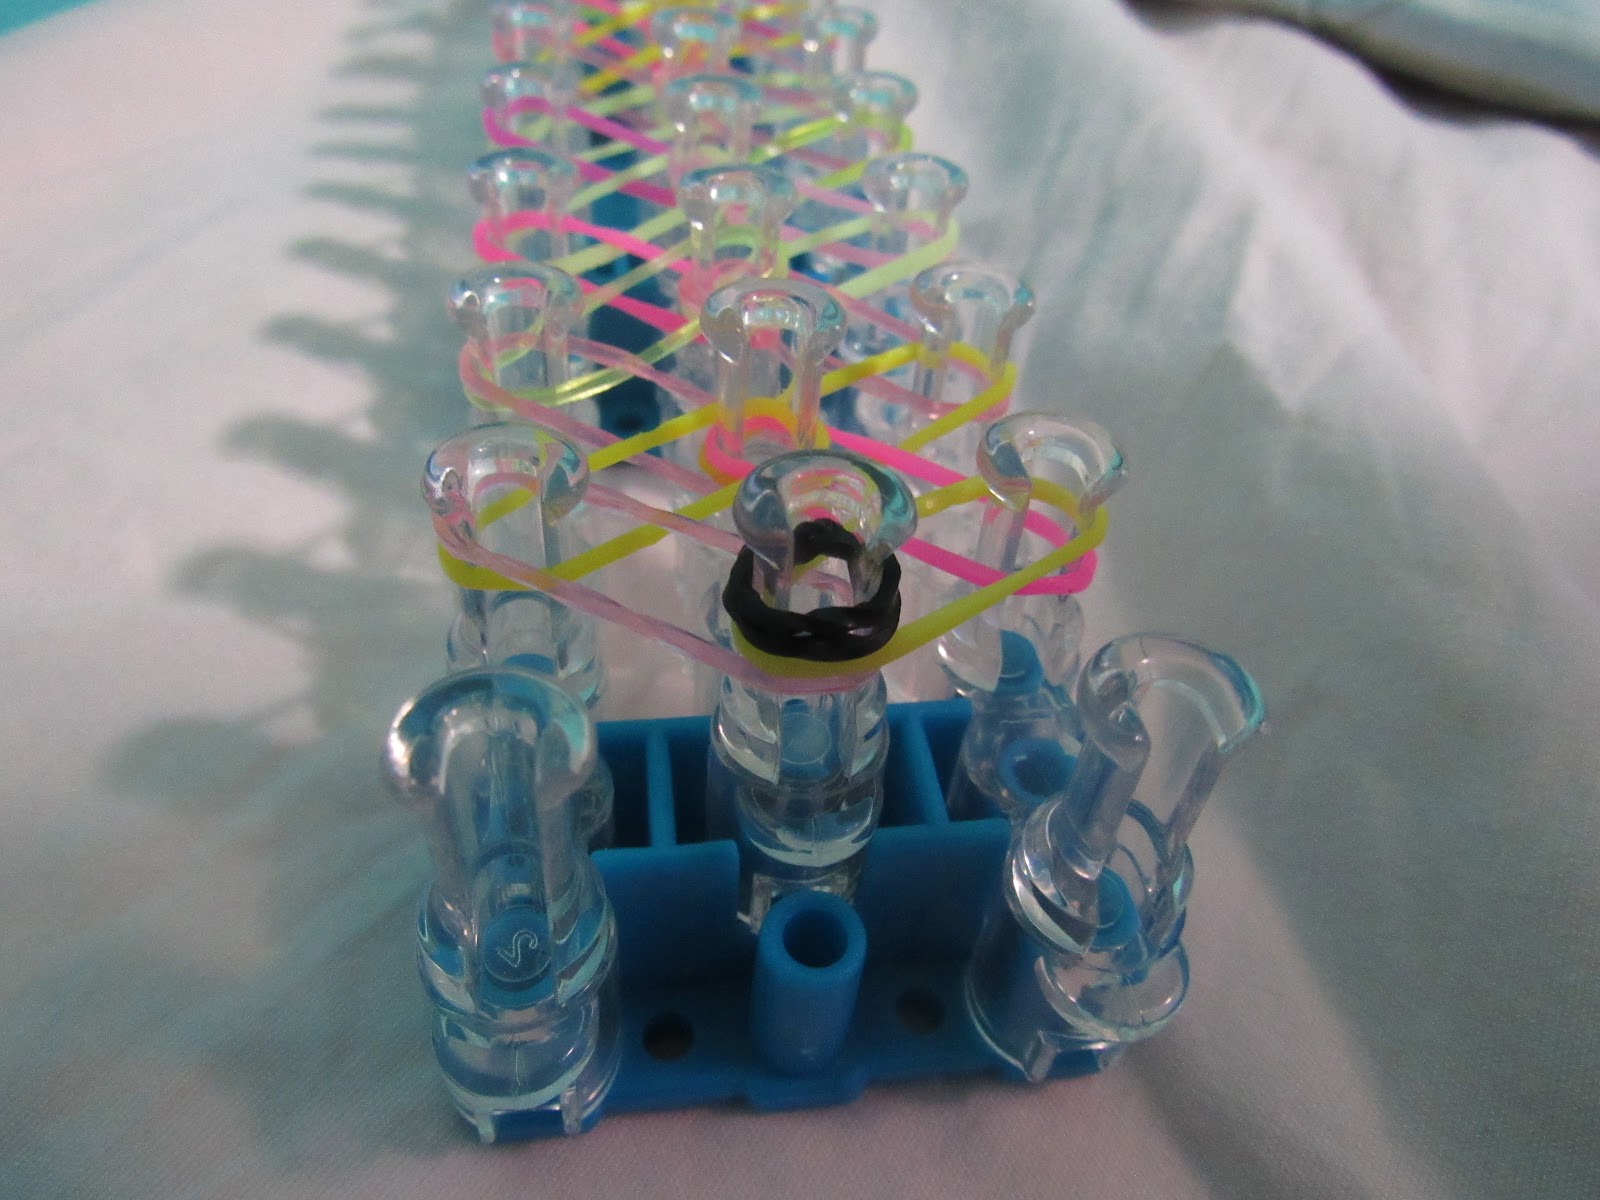
Hello, welcome to another article in the “DIY Rainbow Loom” series! Today I will teach you how to make a standard beginner bracelet called the diamond bracelet. You will need a loom, hook, s-clip/c-clip, and rubber bands.
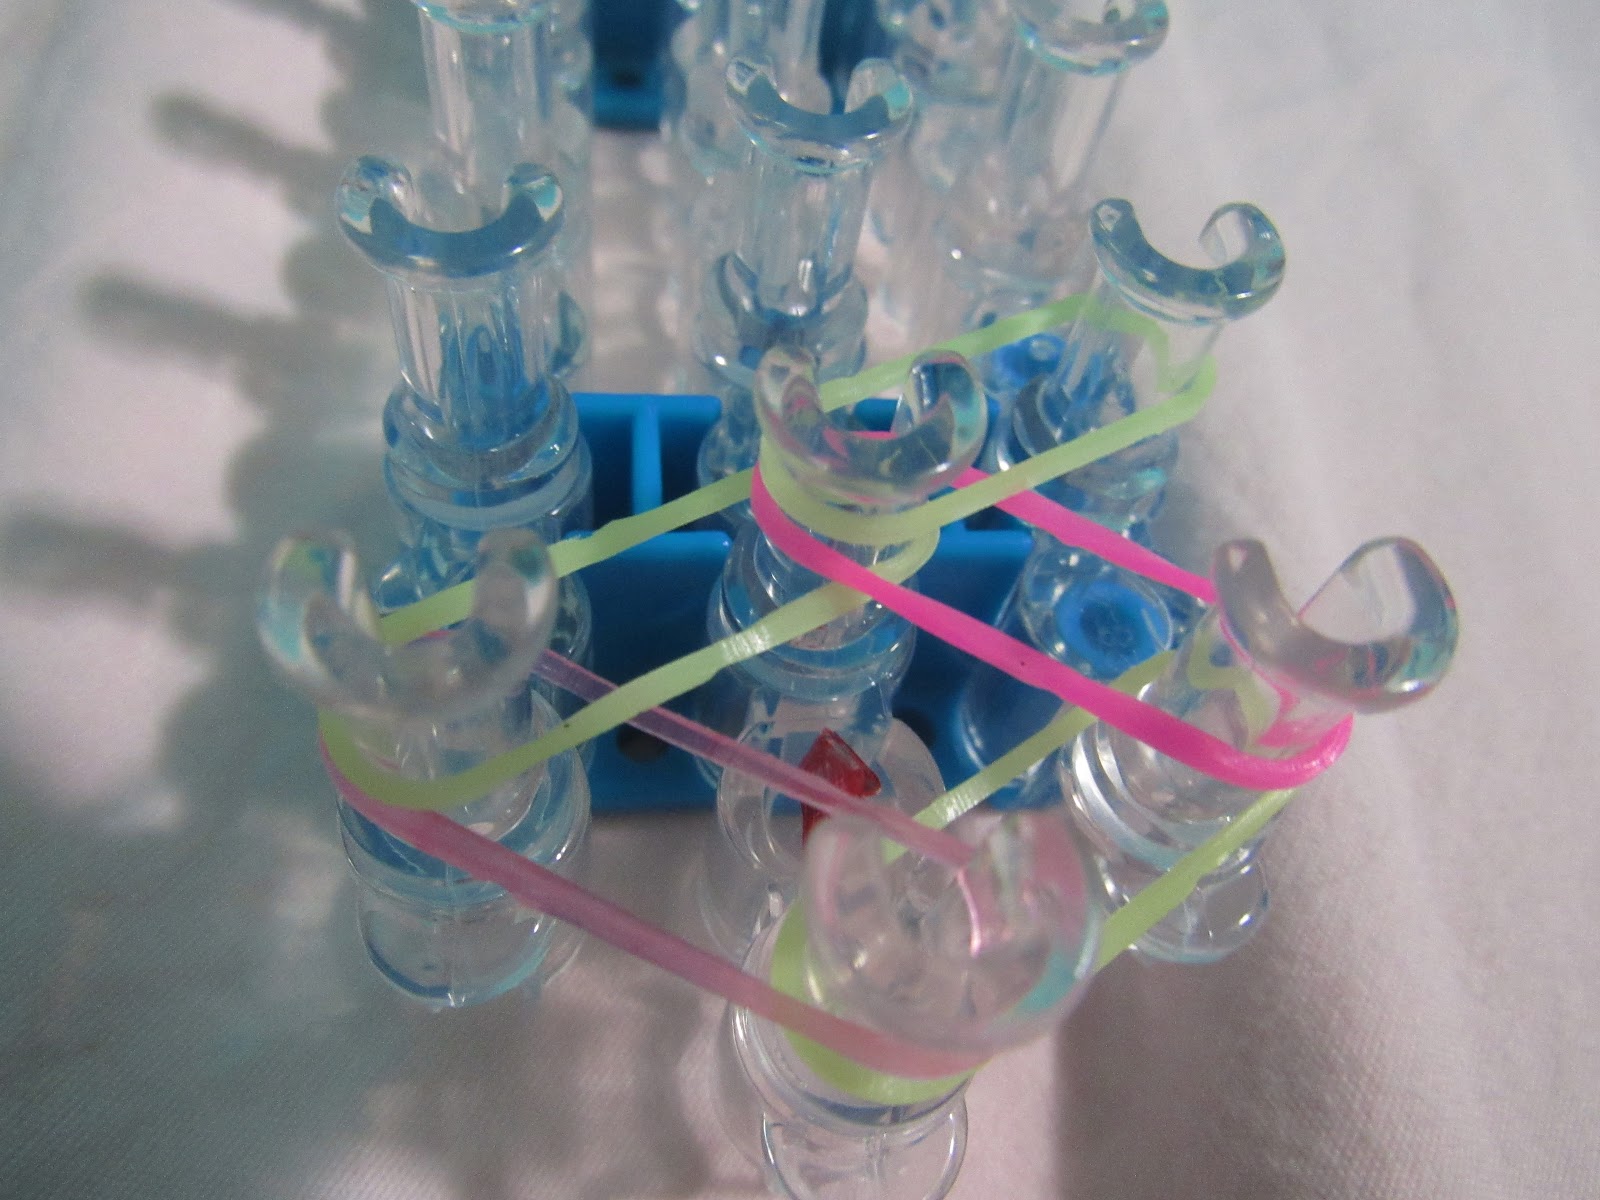
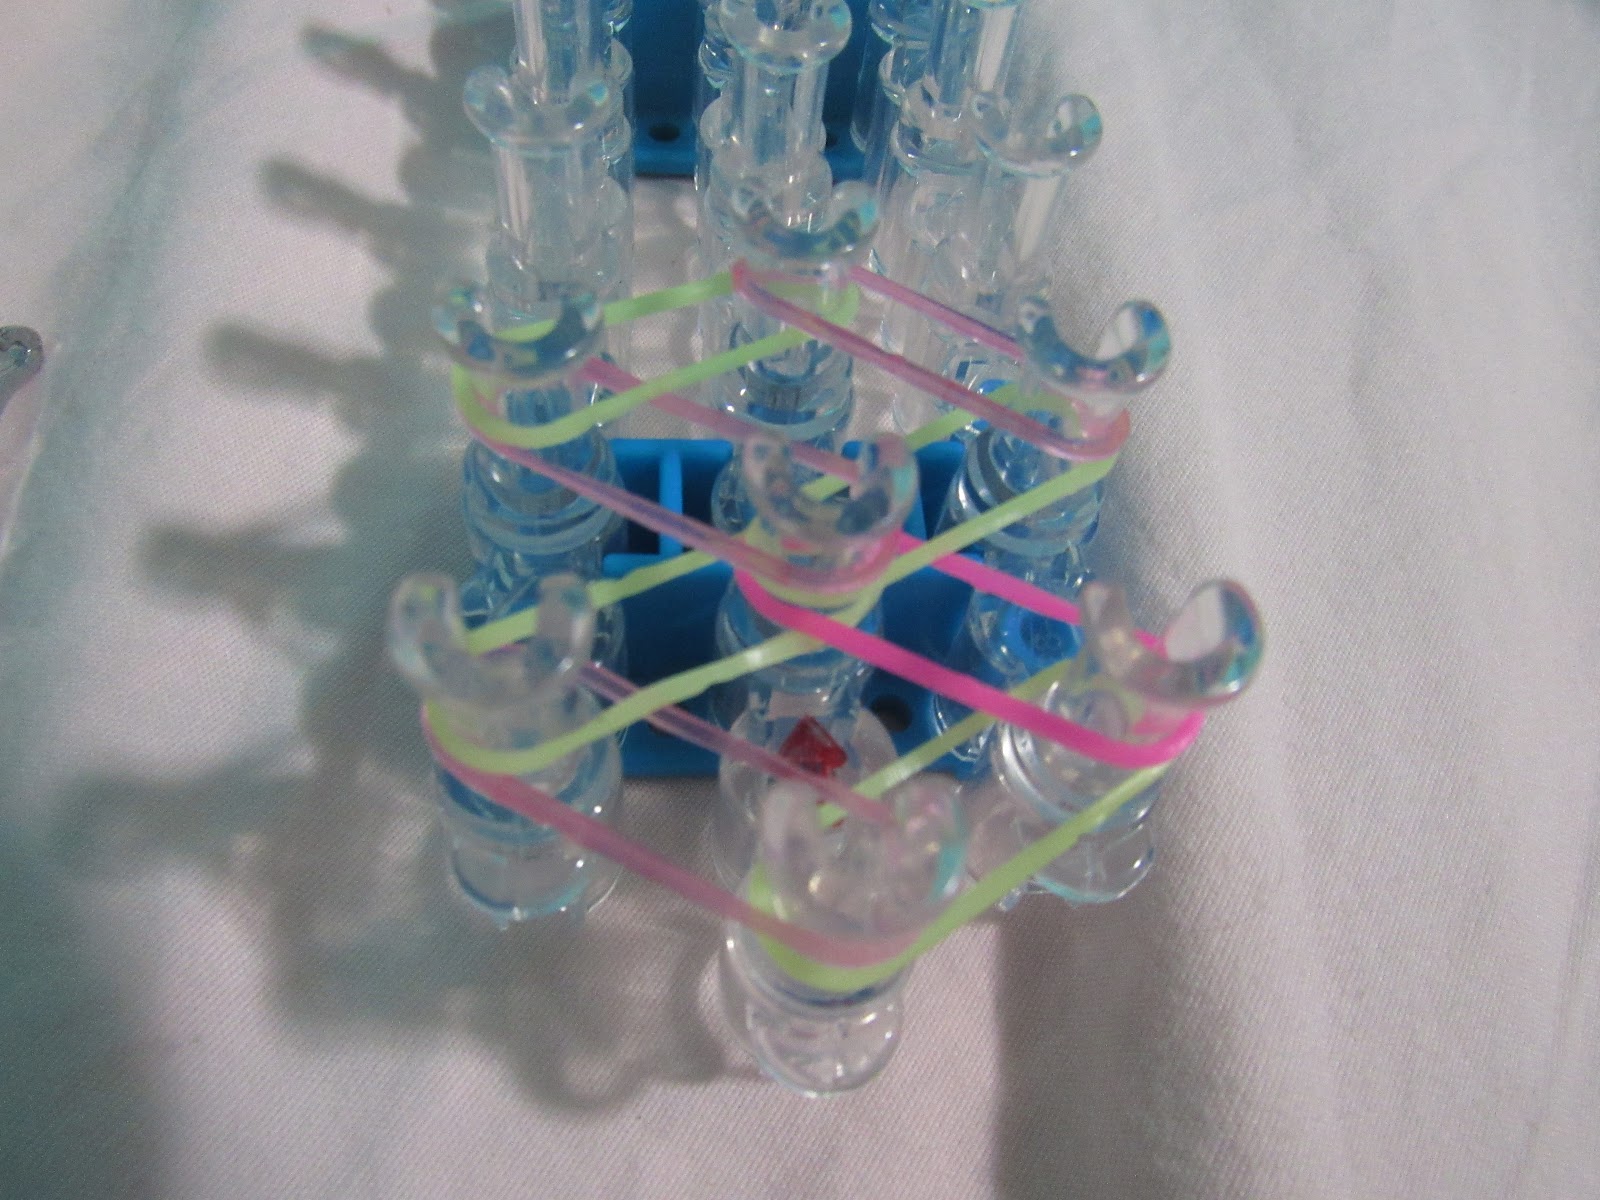
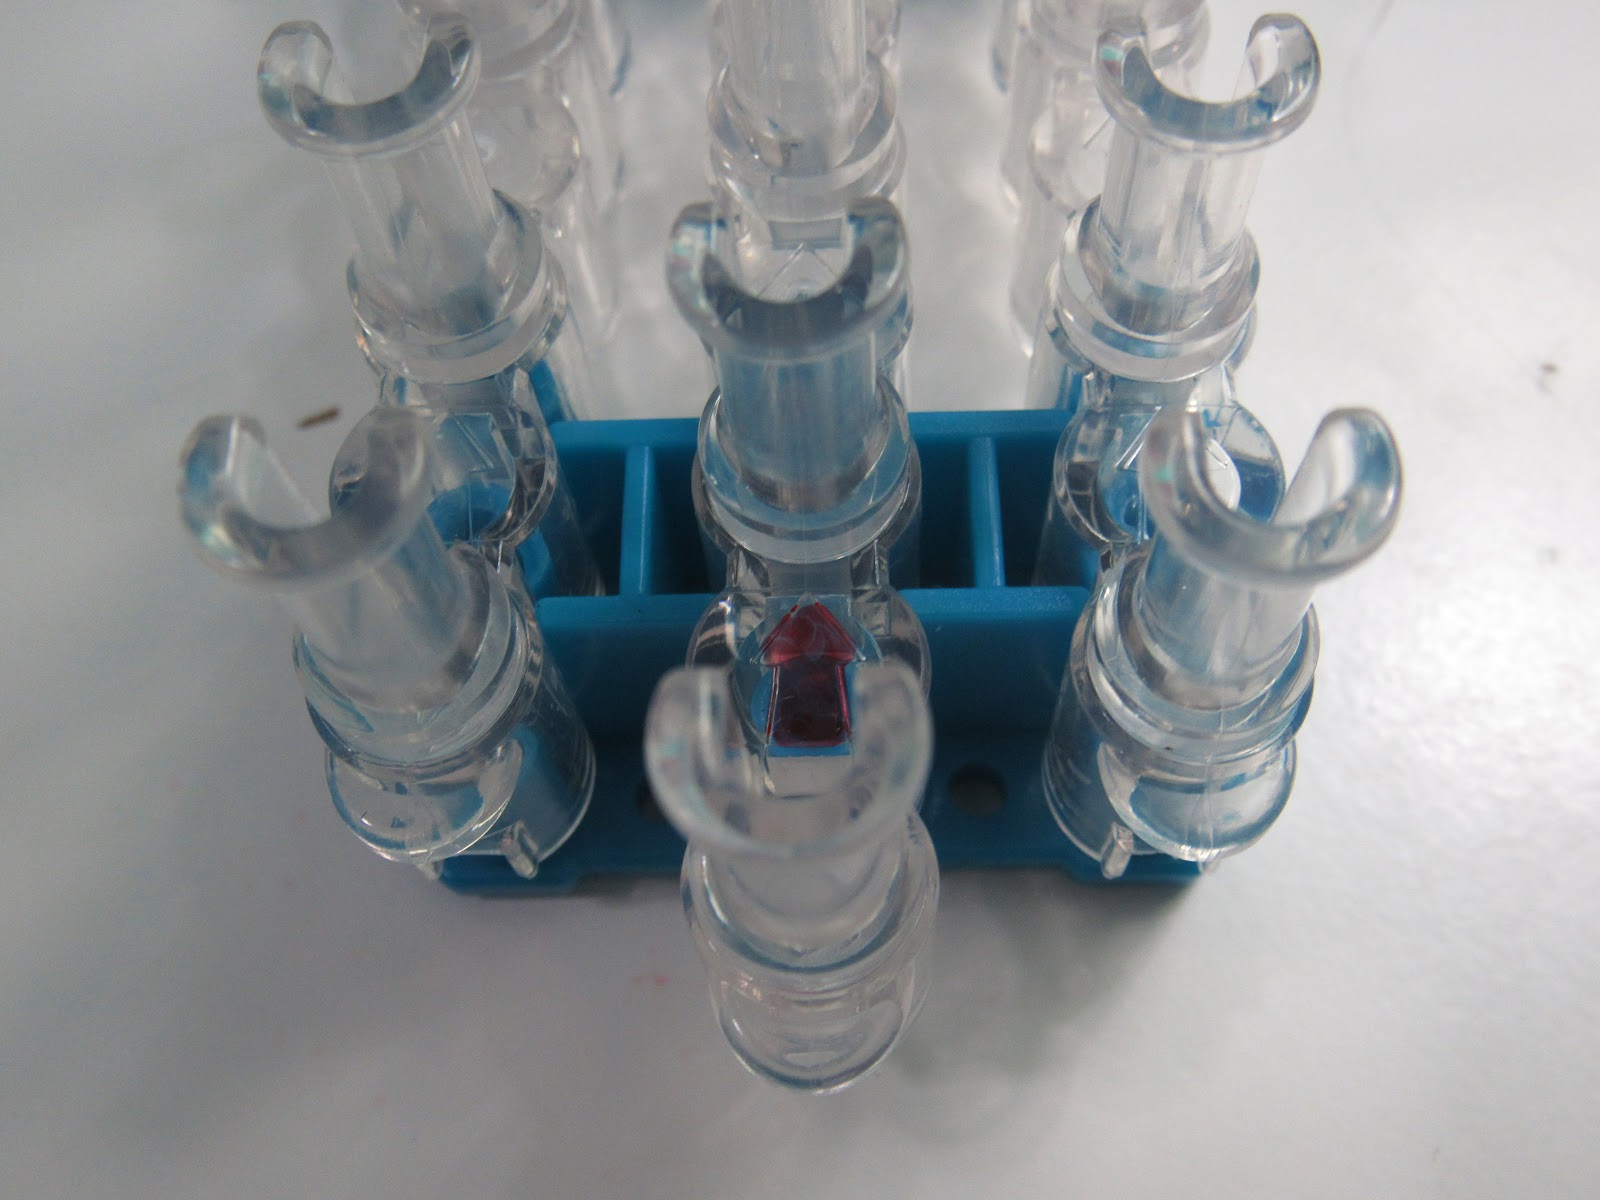
First, make sure you start placing bands on the side where the red arrow is closer to you.
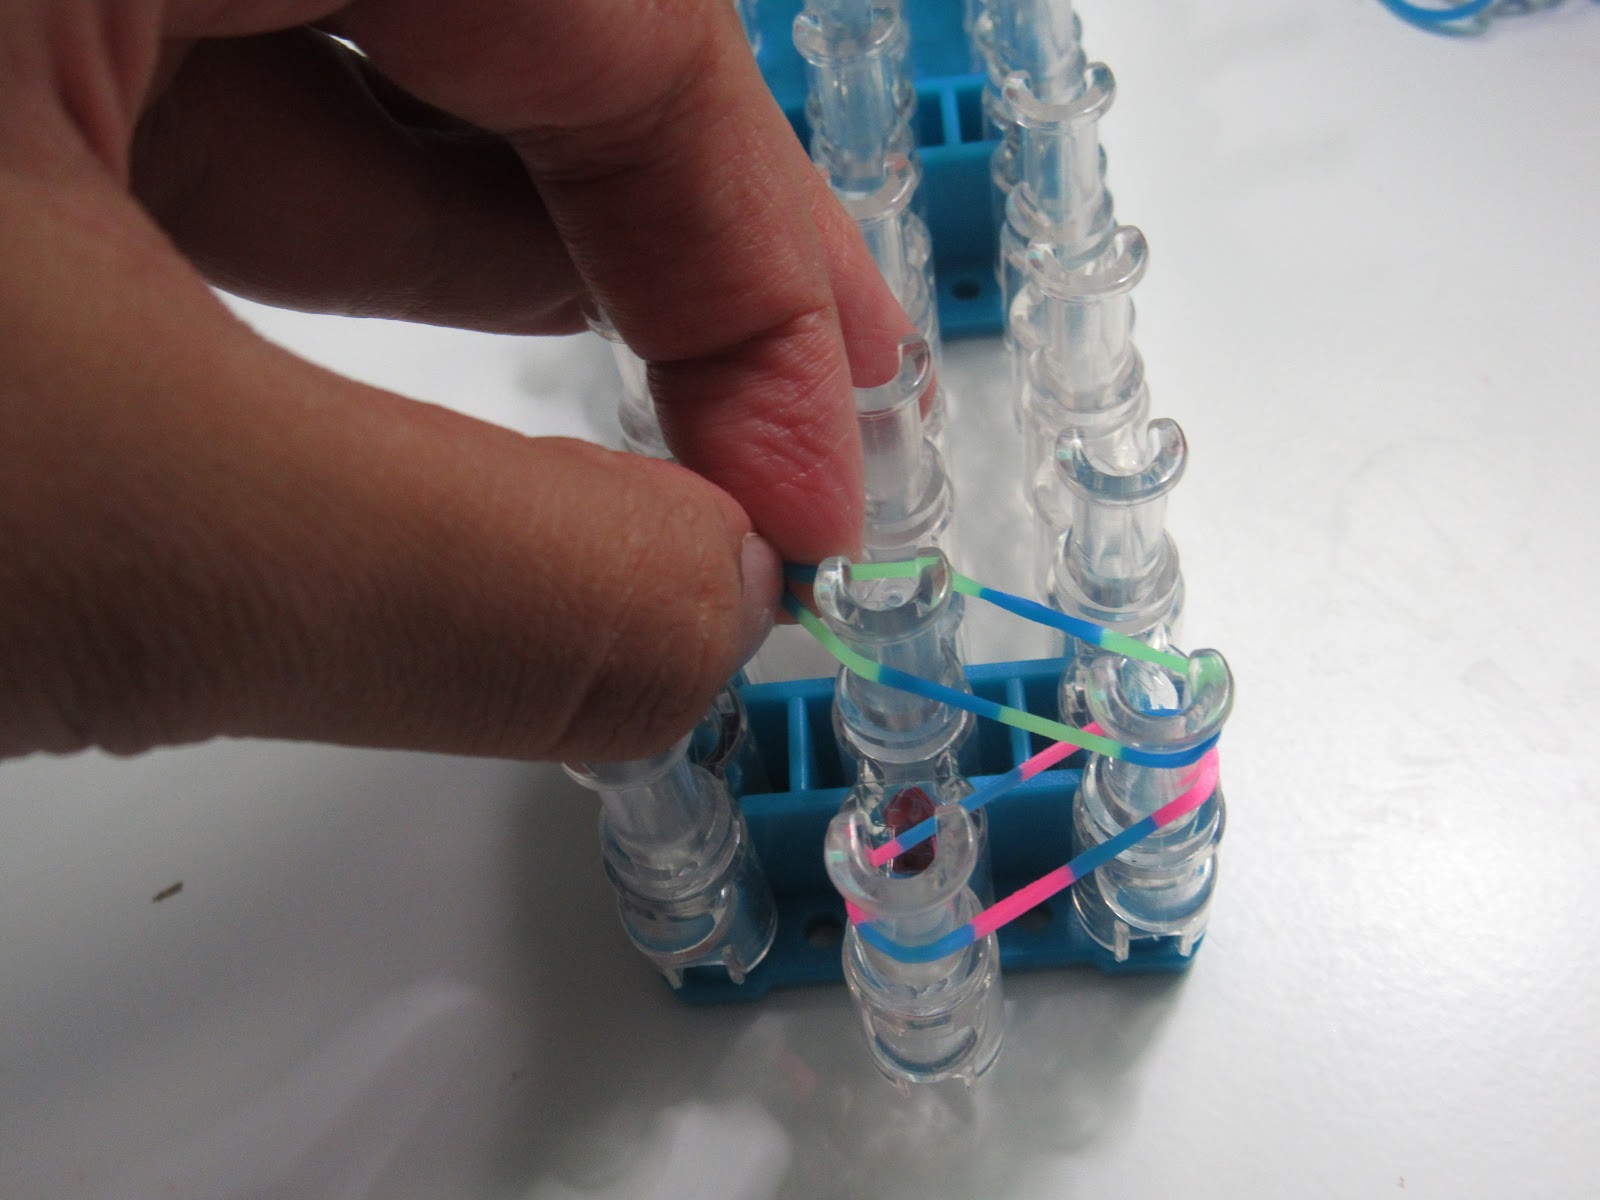
Second, start placing your bands in a diamond pattern like the example below.
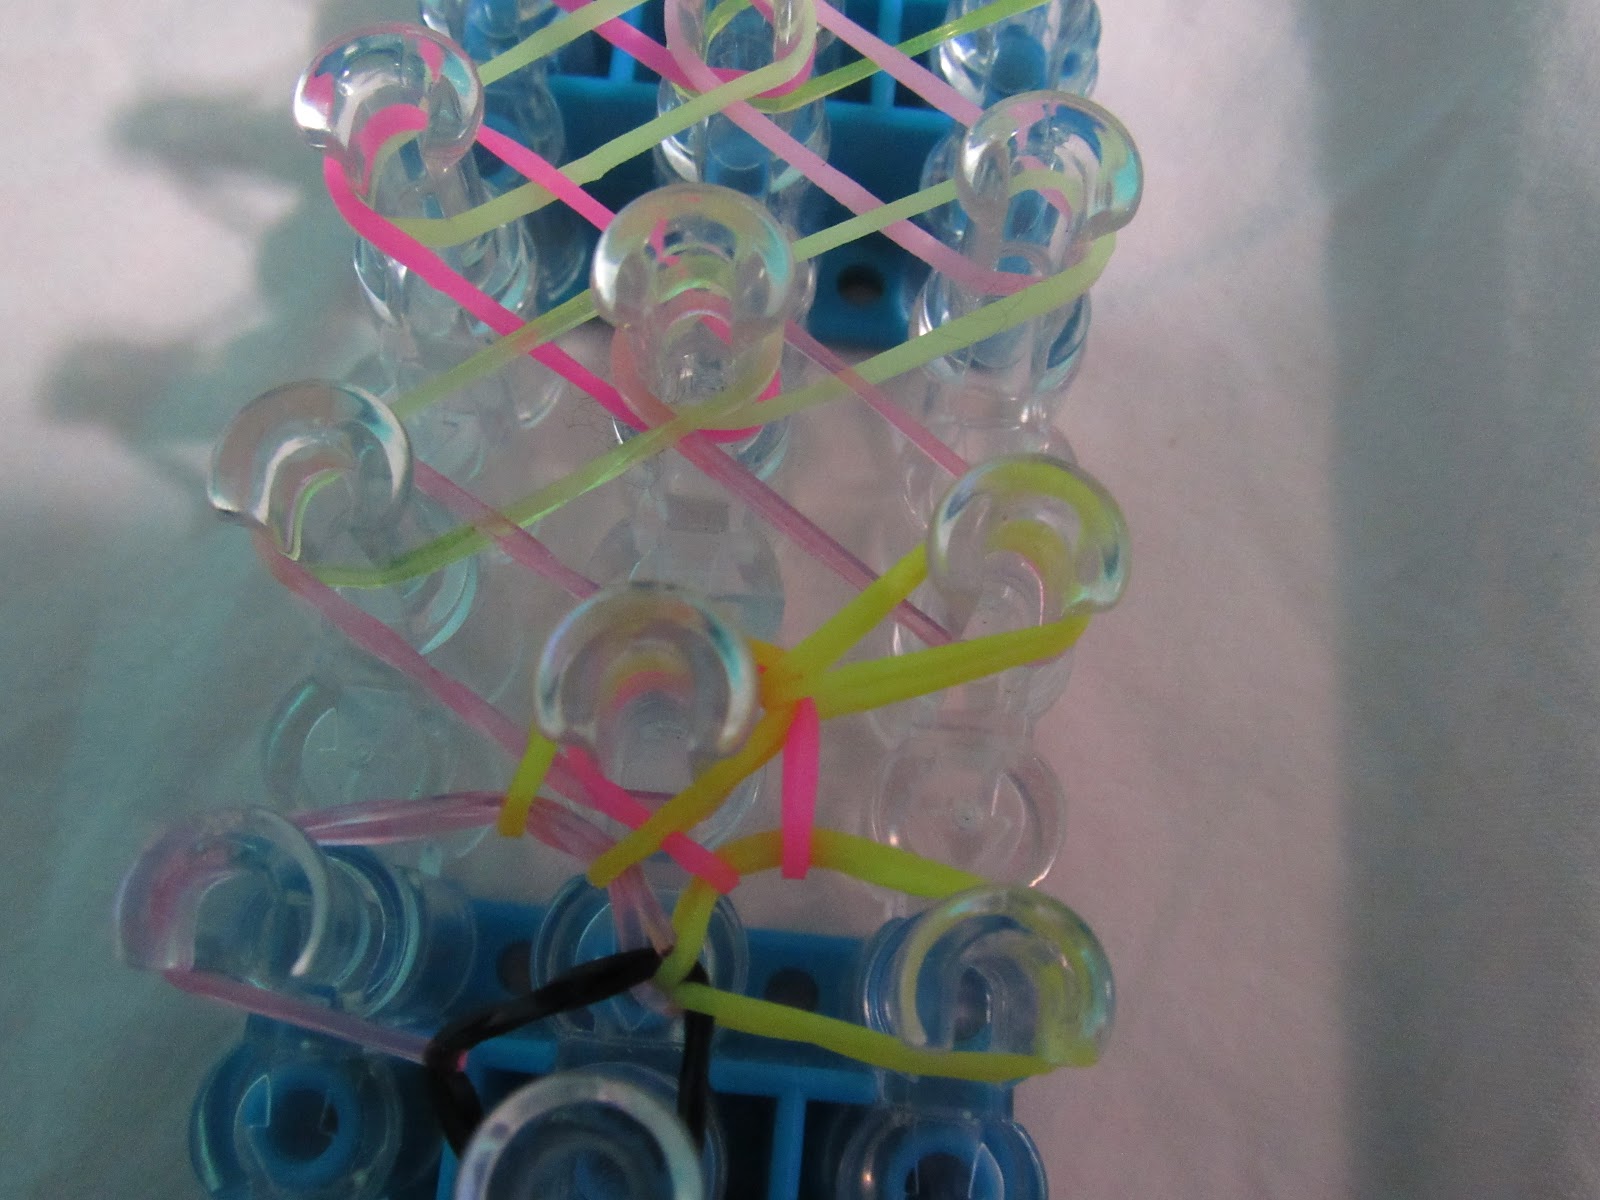
Continue using the images below to help you place the bands.
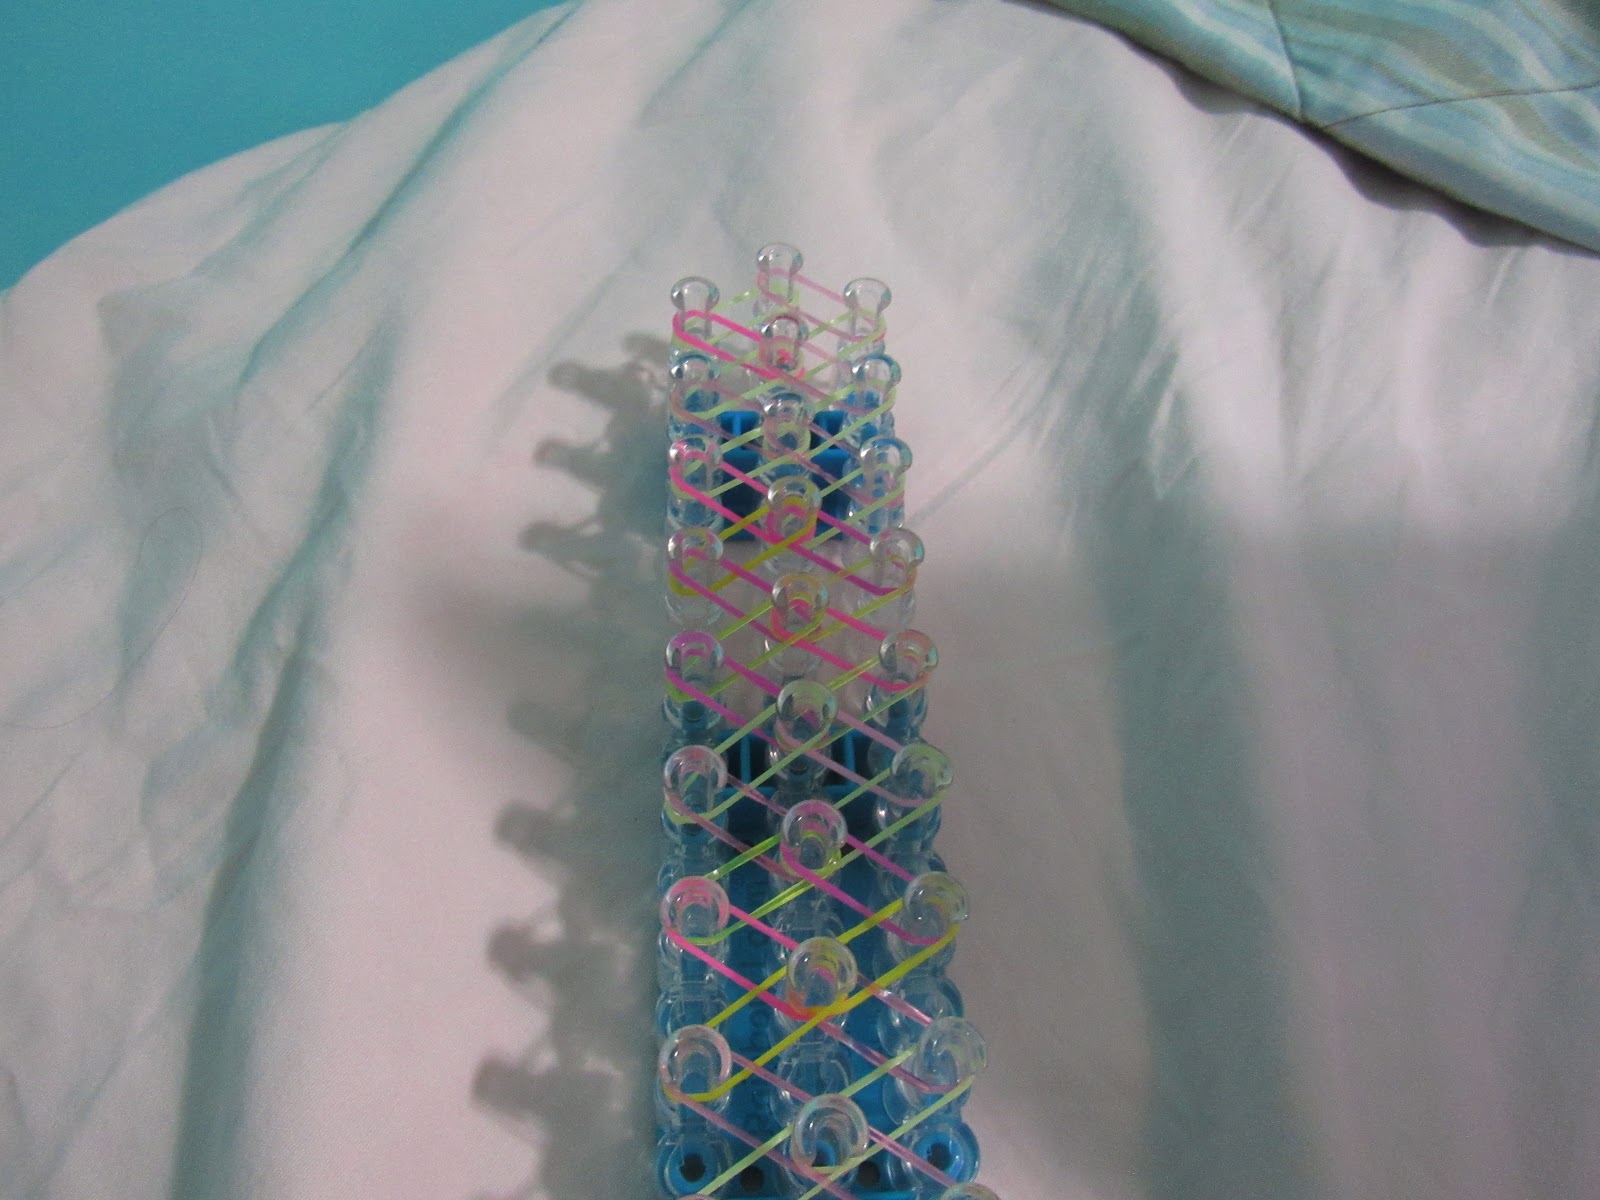
Once you have placed all your bands, the final result should look like this.
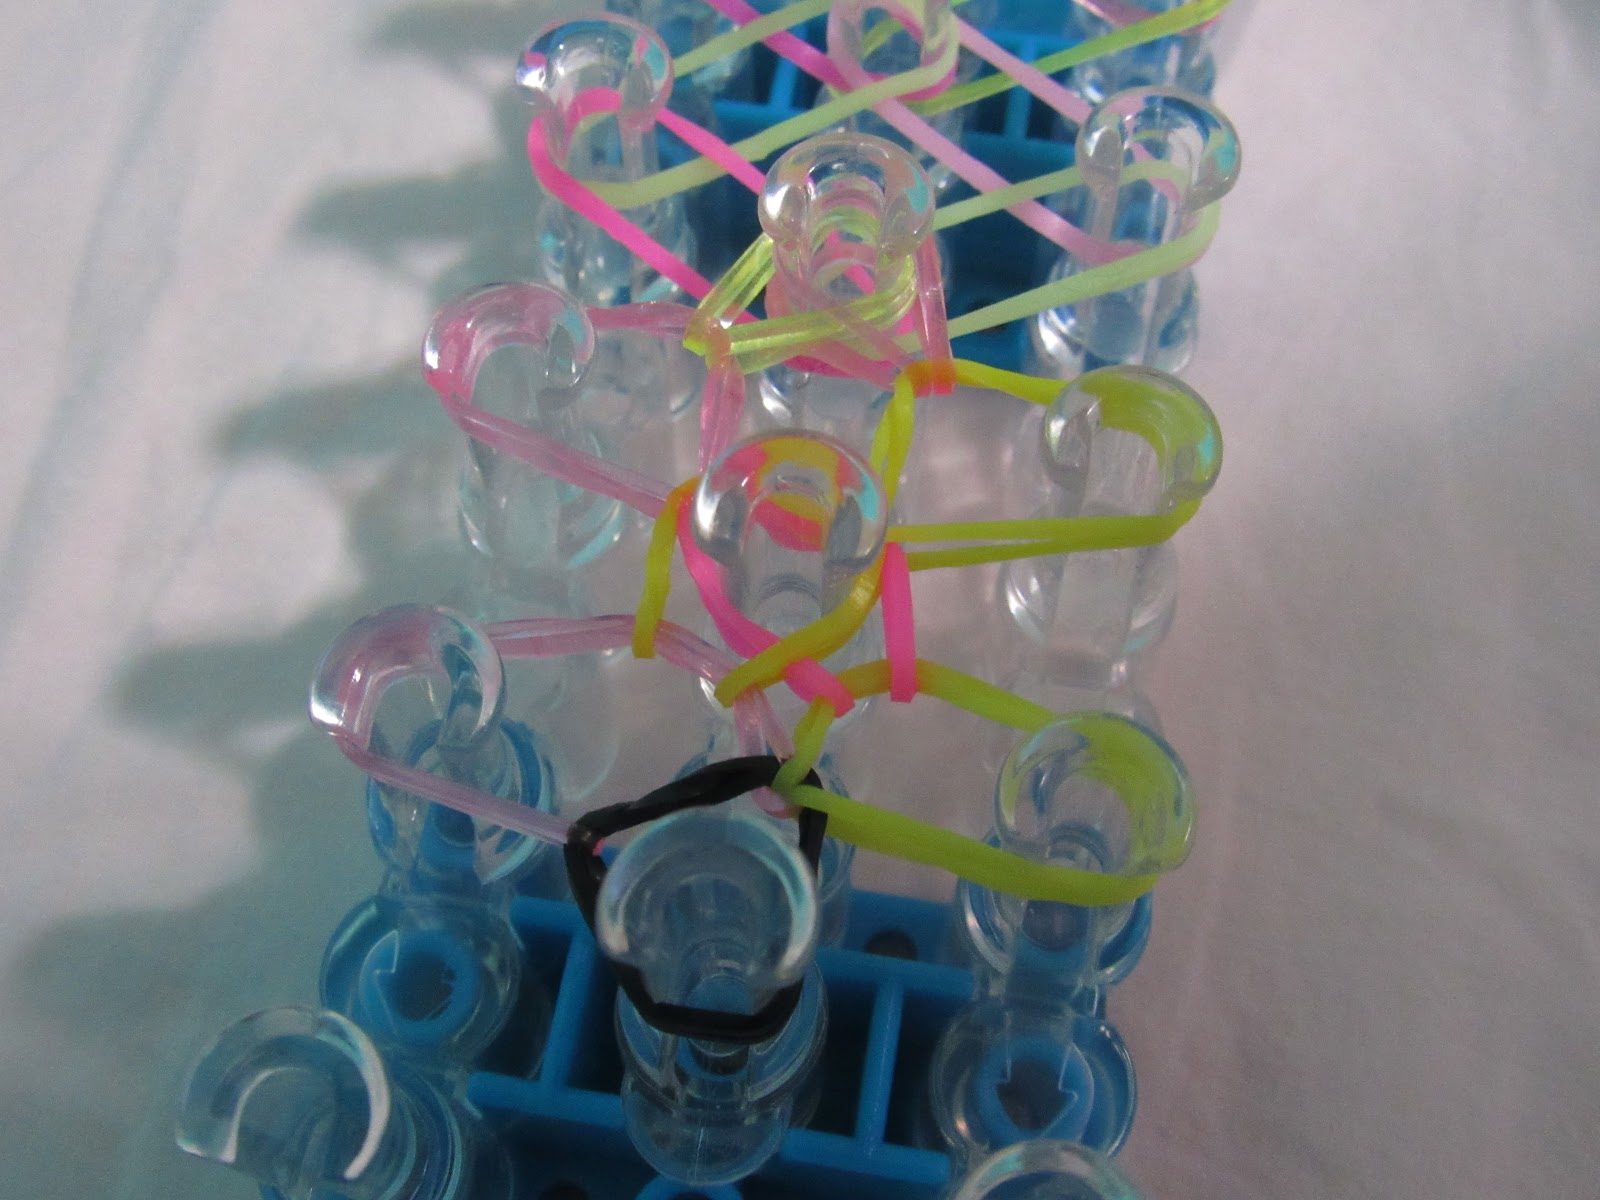
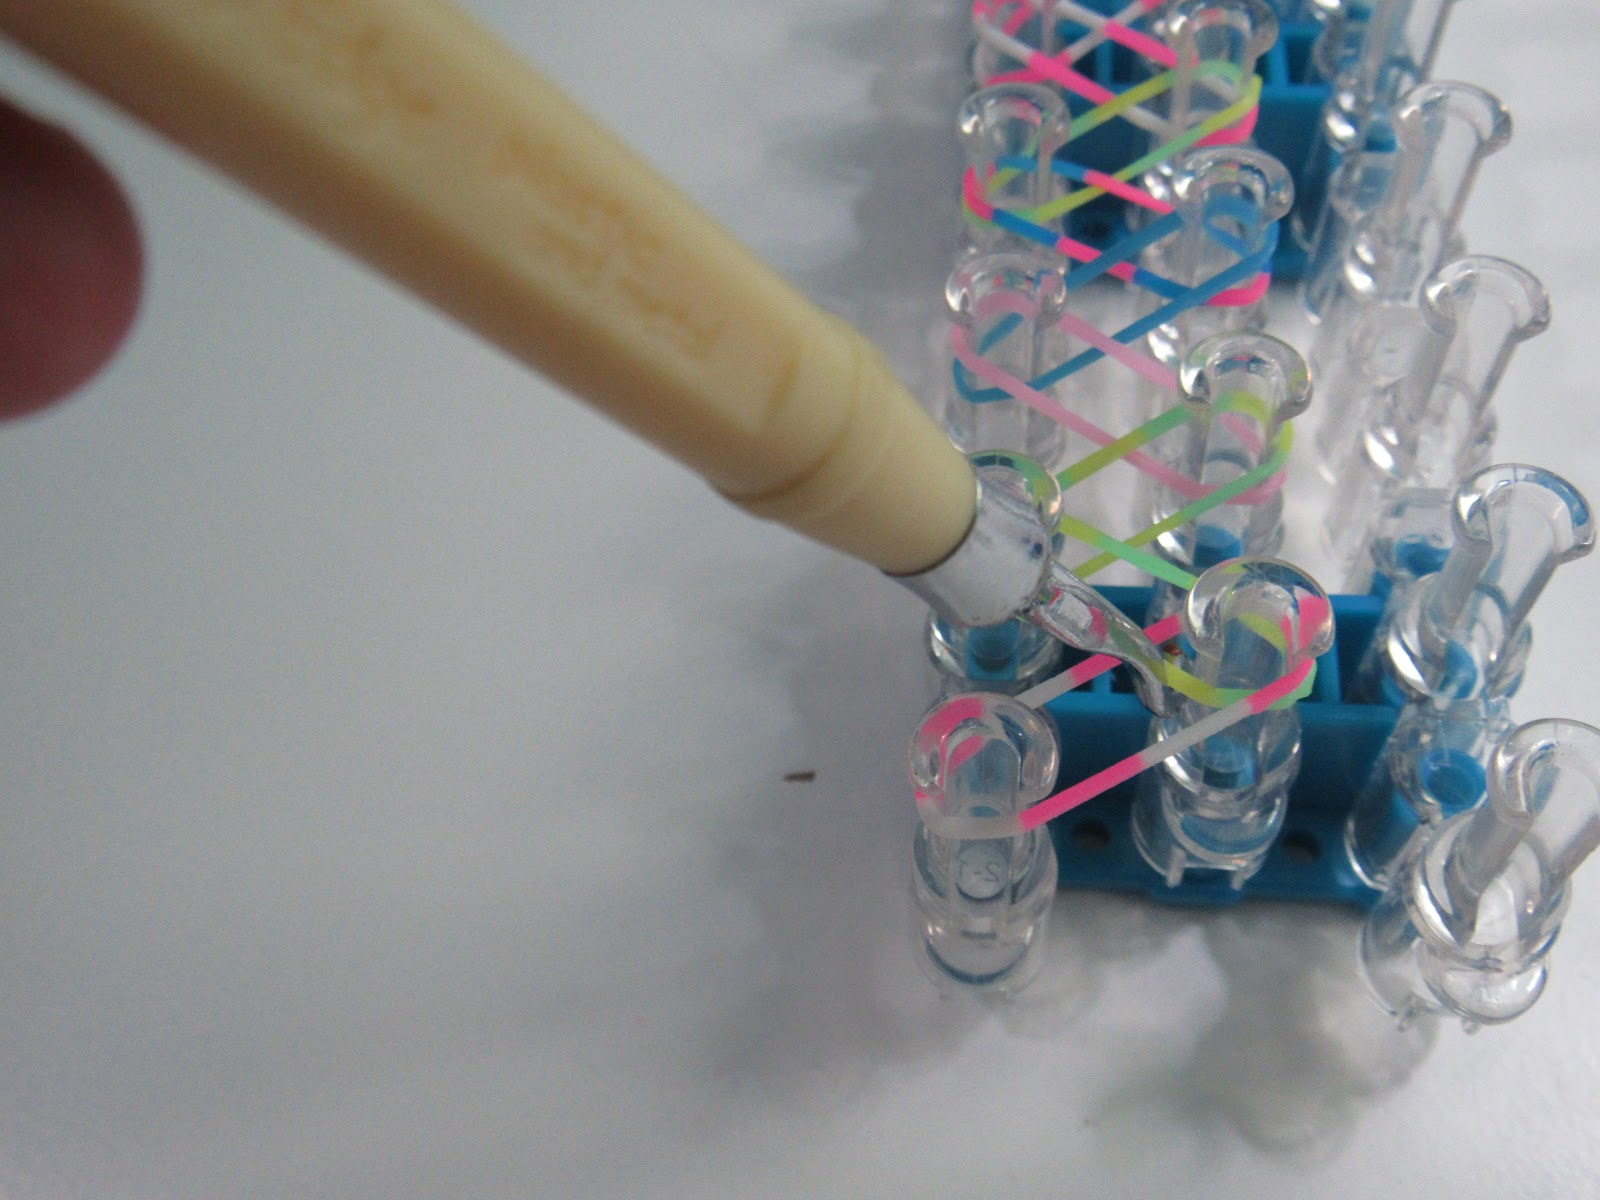
Turn your loom over to the side where there is no red arrow. It is time to start looming!
Now, we are going to learn how to make a cap-band. It will help bind off the bracelet. Use the examples below to make one.
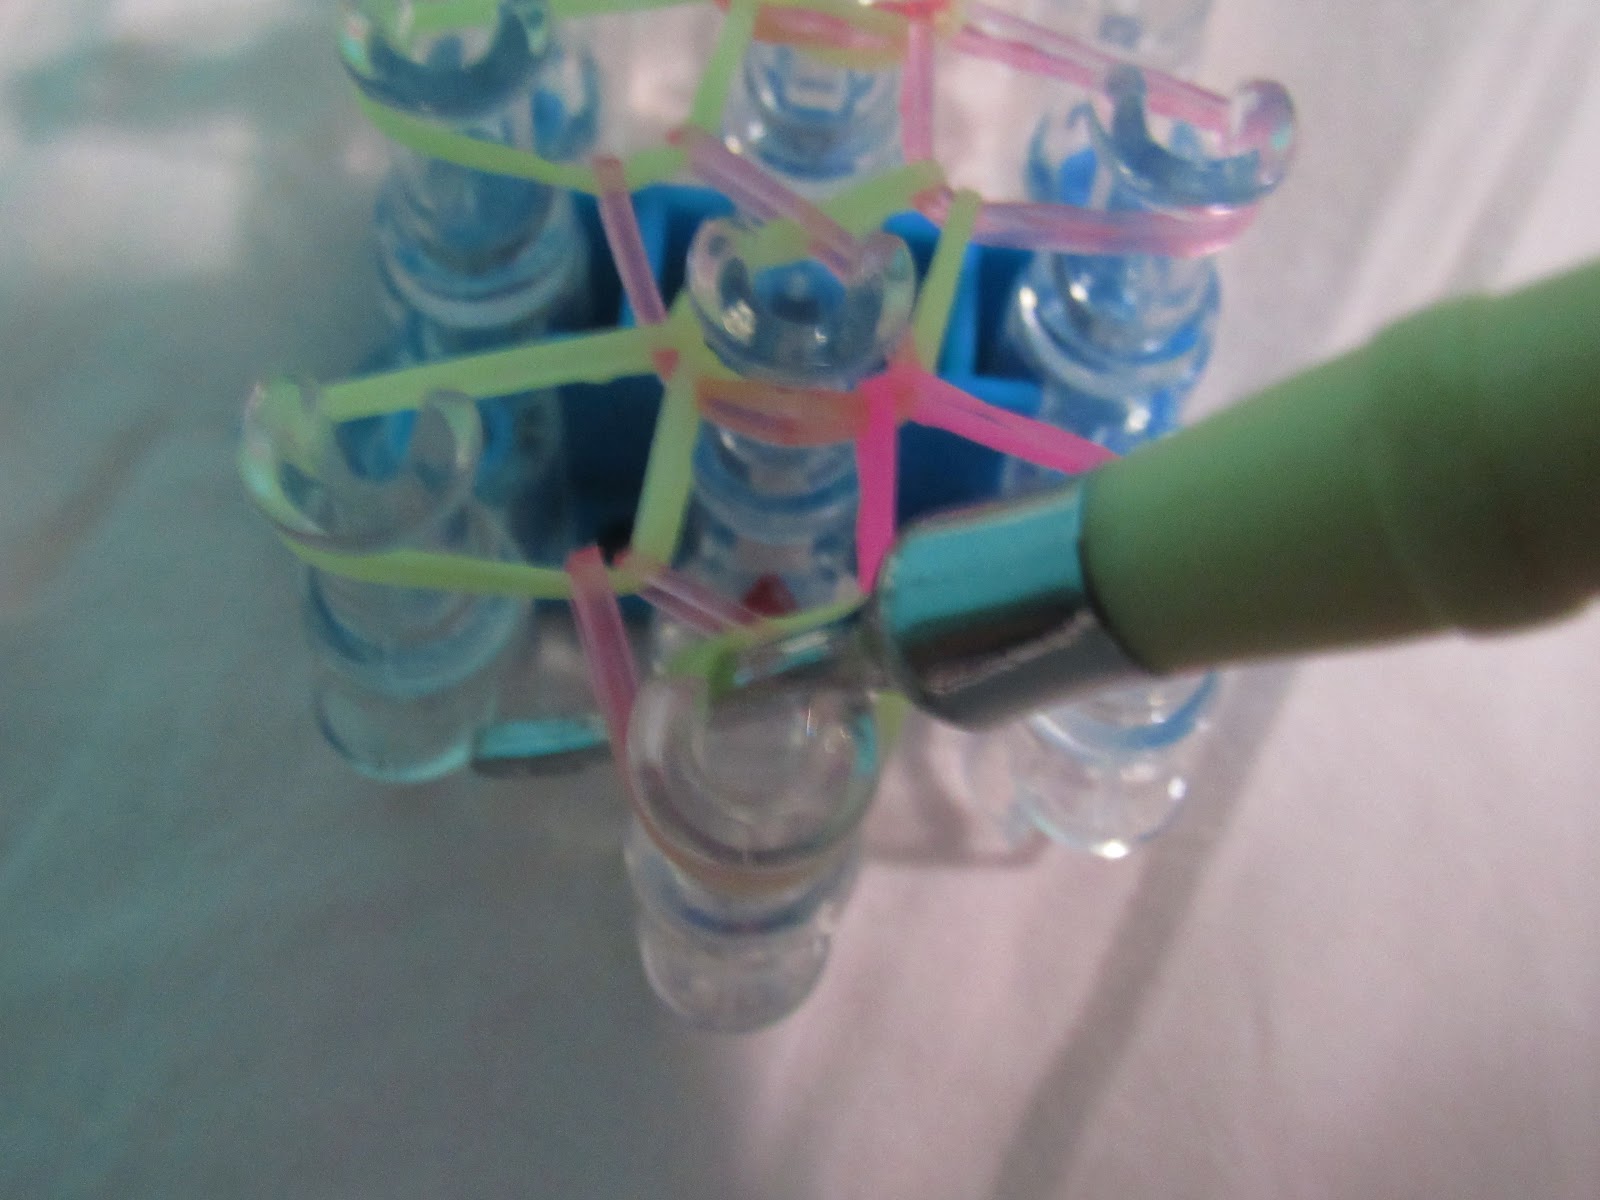
You are officially ready to loom! Place your hook in the cap-band, grab a band, take it off the peg, and then place it on the peg that has a corresponding color.
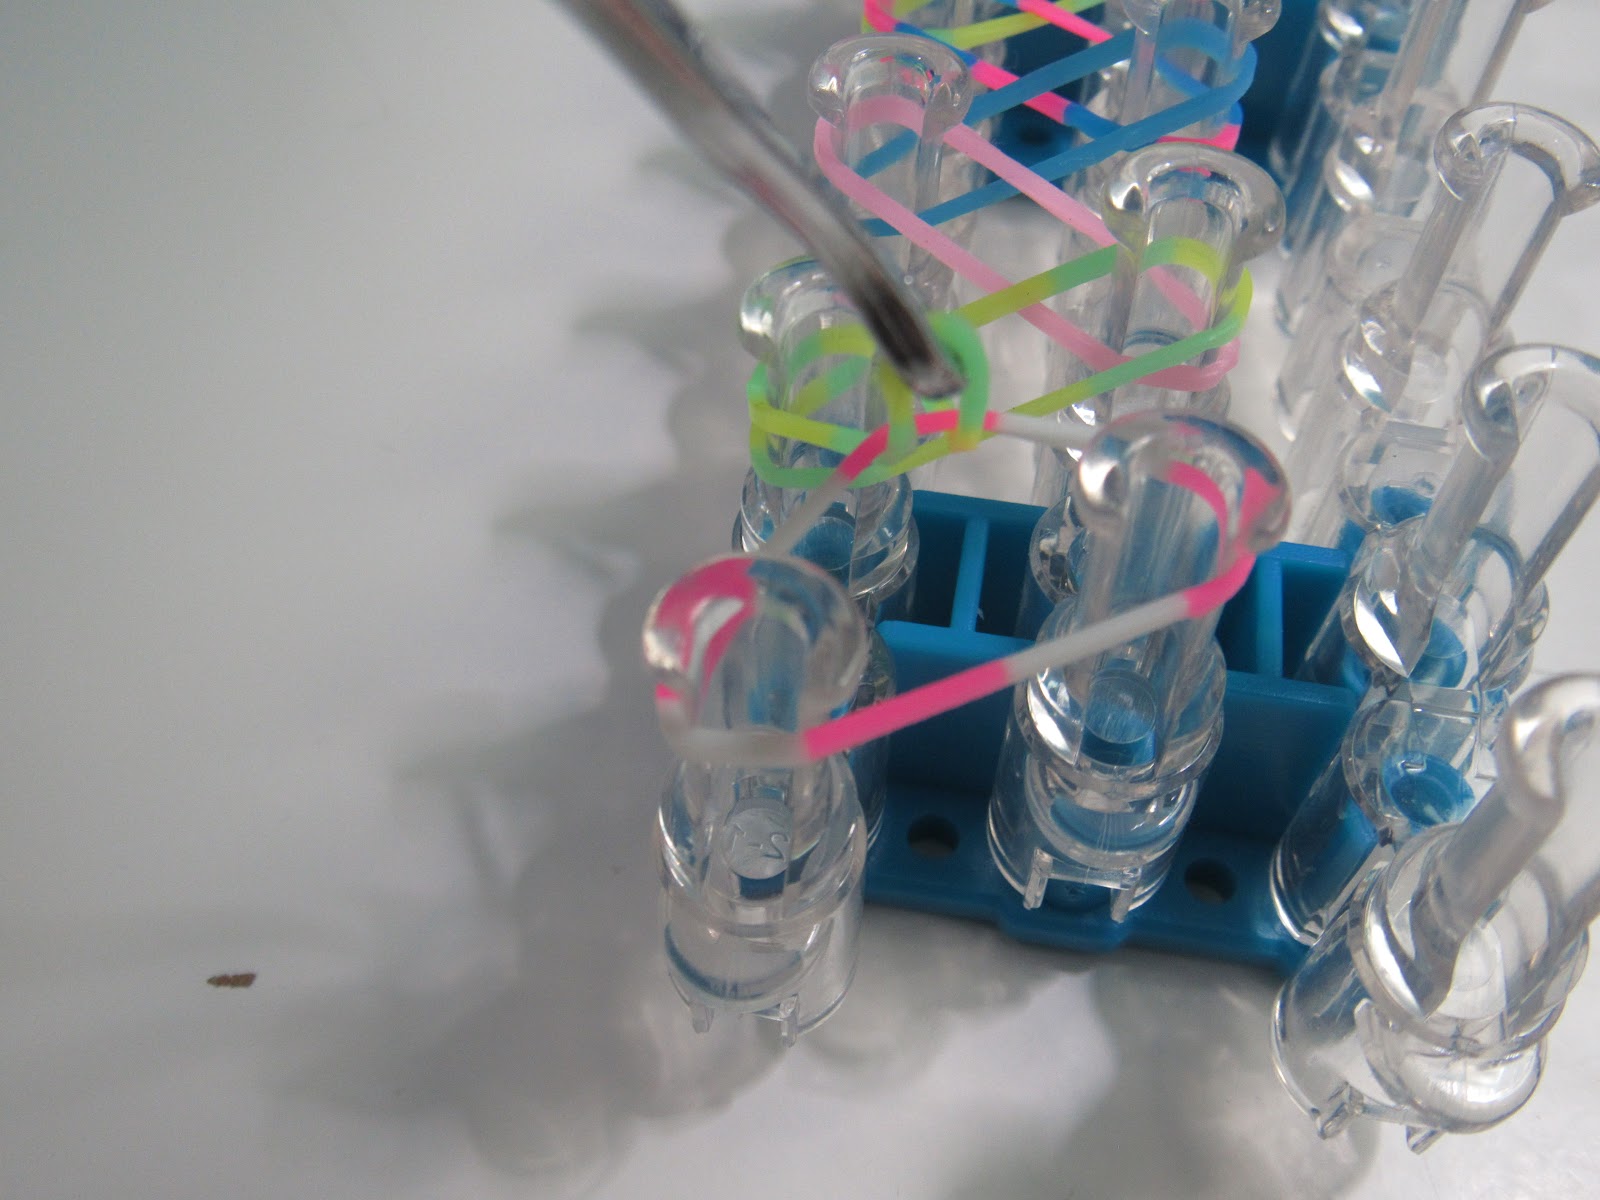
Do the same with the yellow band.
Start looming the yellow and pink bands. If you need help, read the steps above.
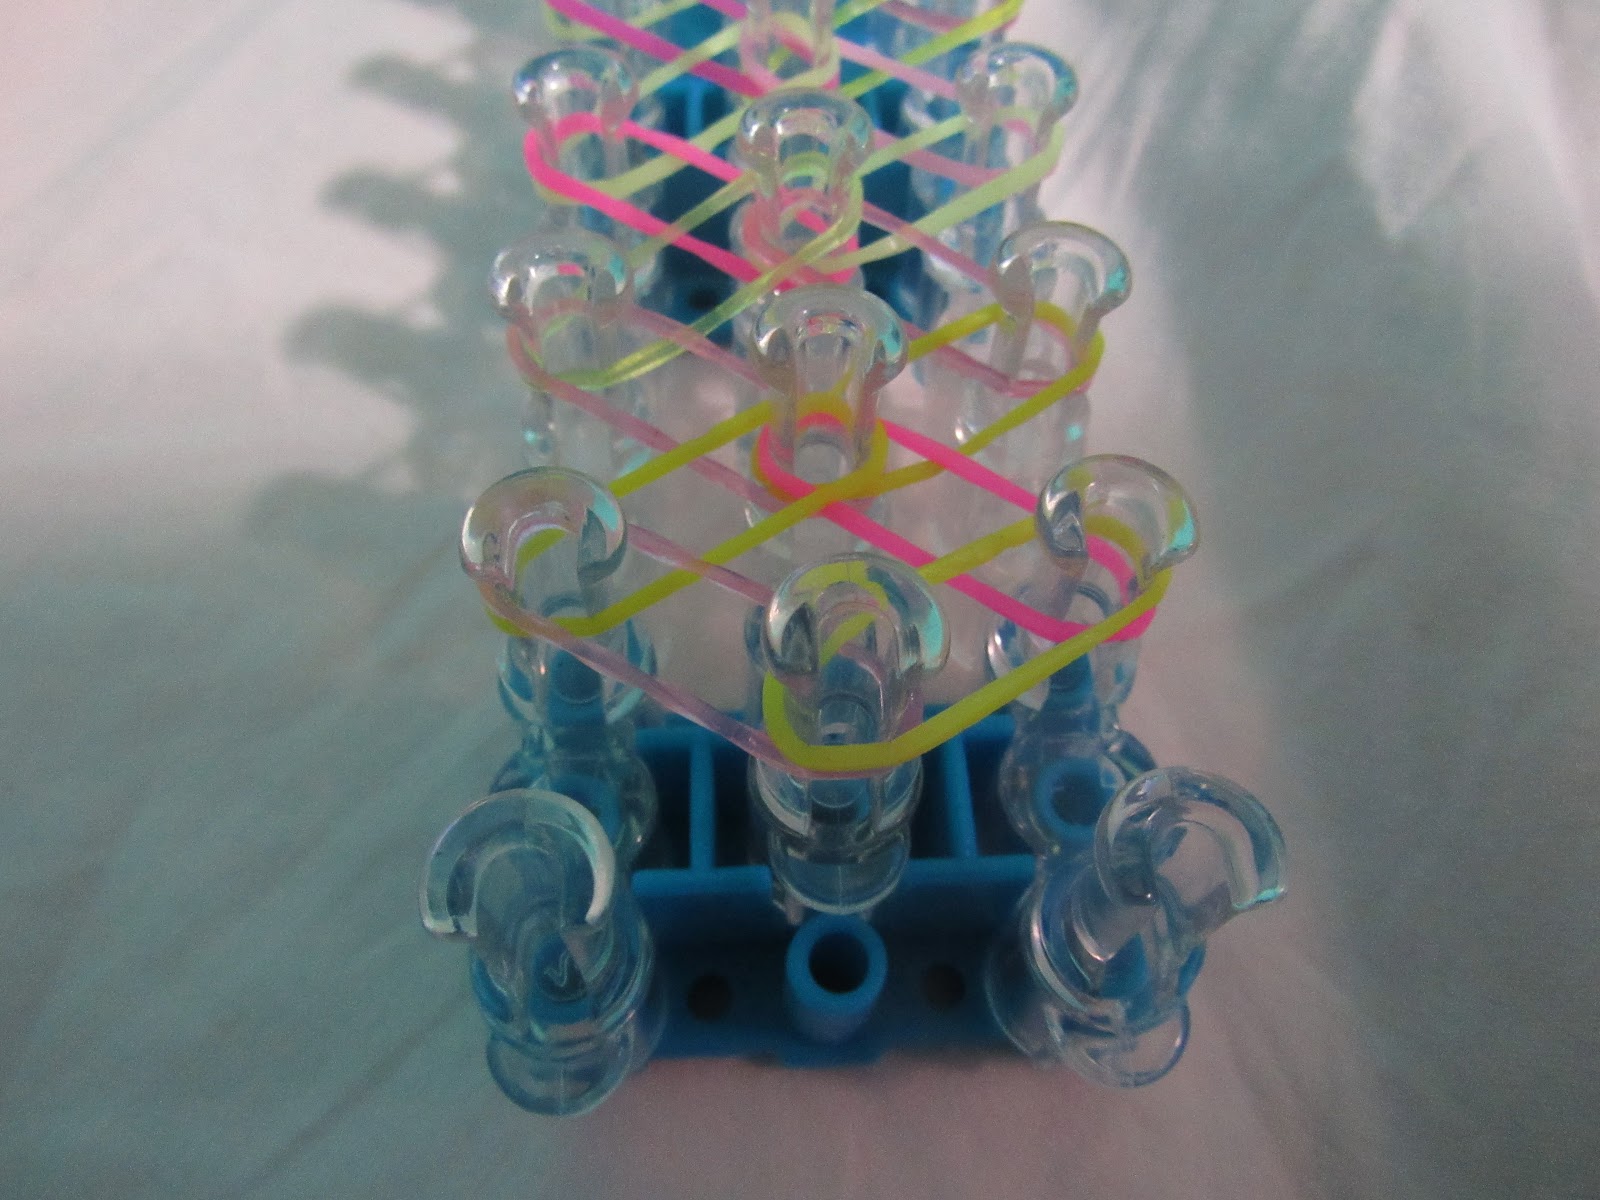
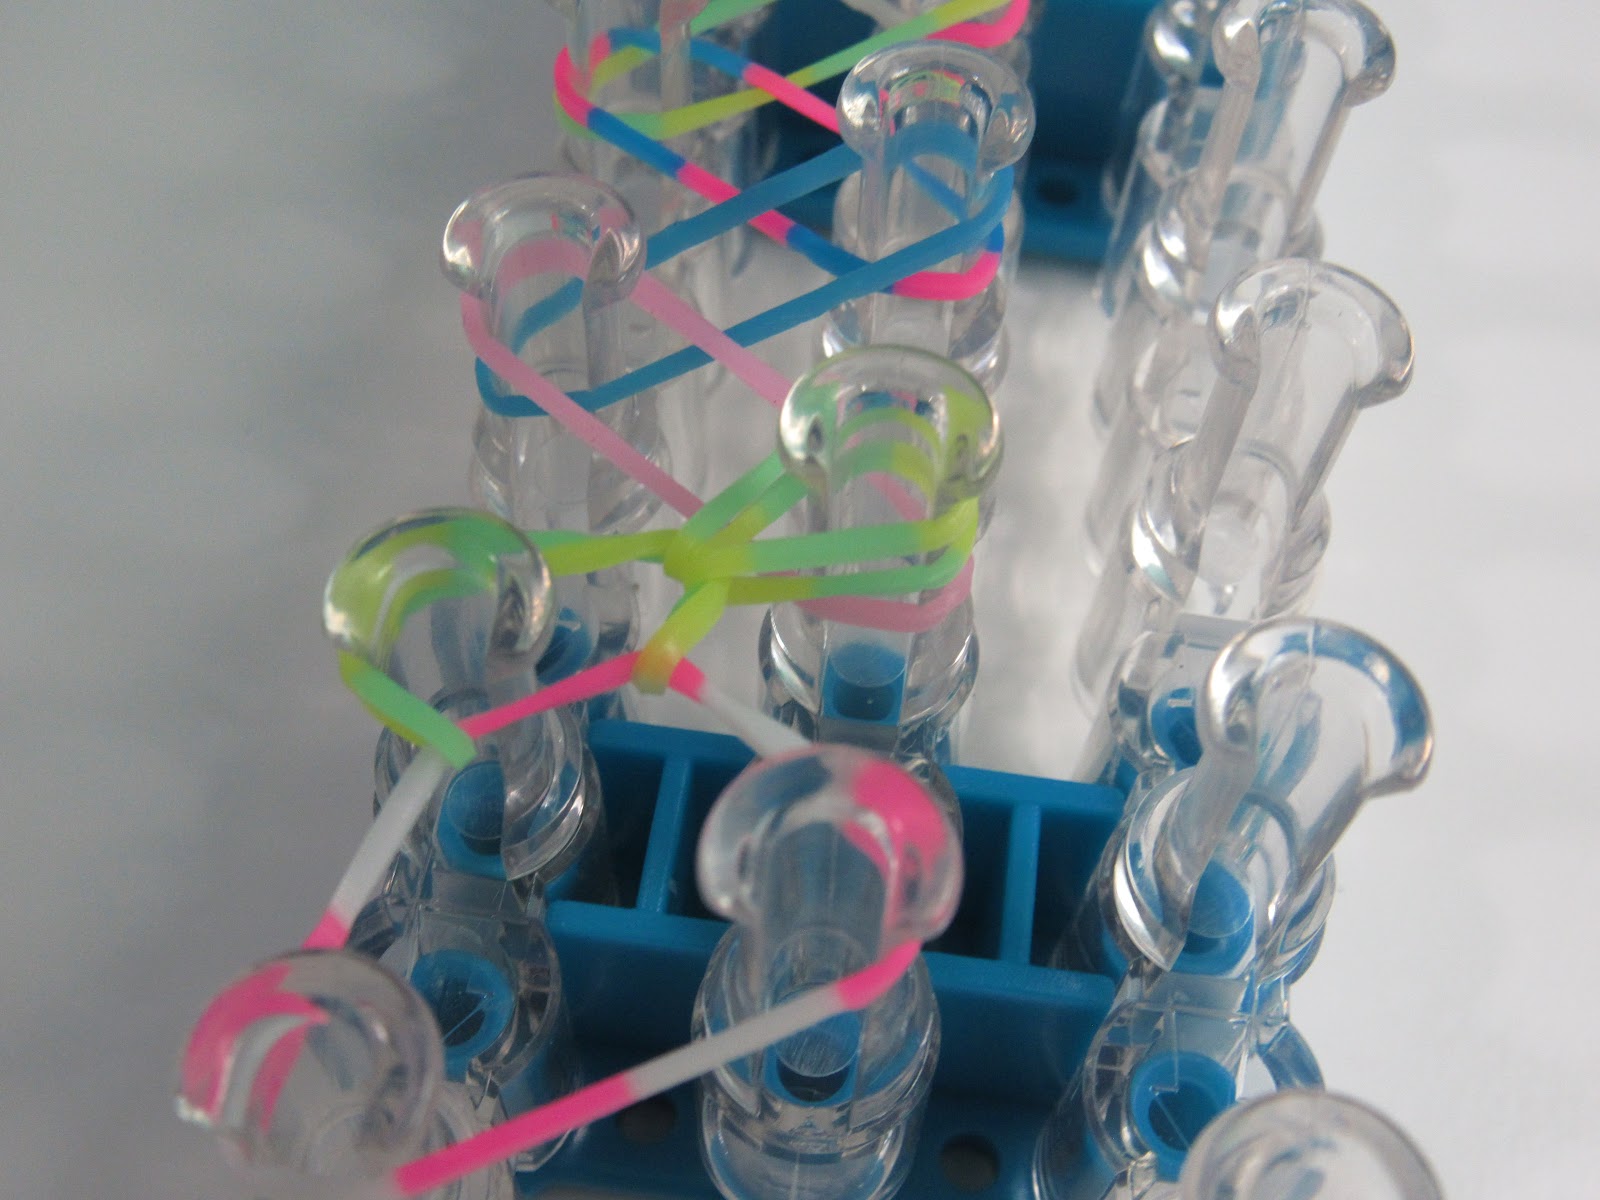
Good Job! Reach inside those bands and grab the band that corresponds to the one diagonal to it. Continue looming after you have done that.
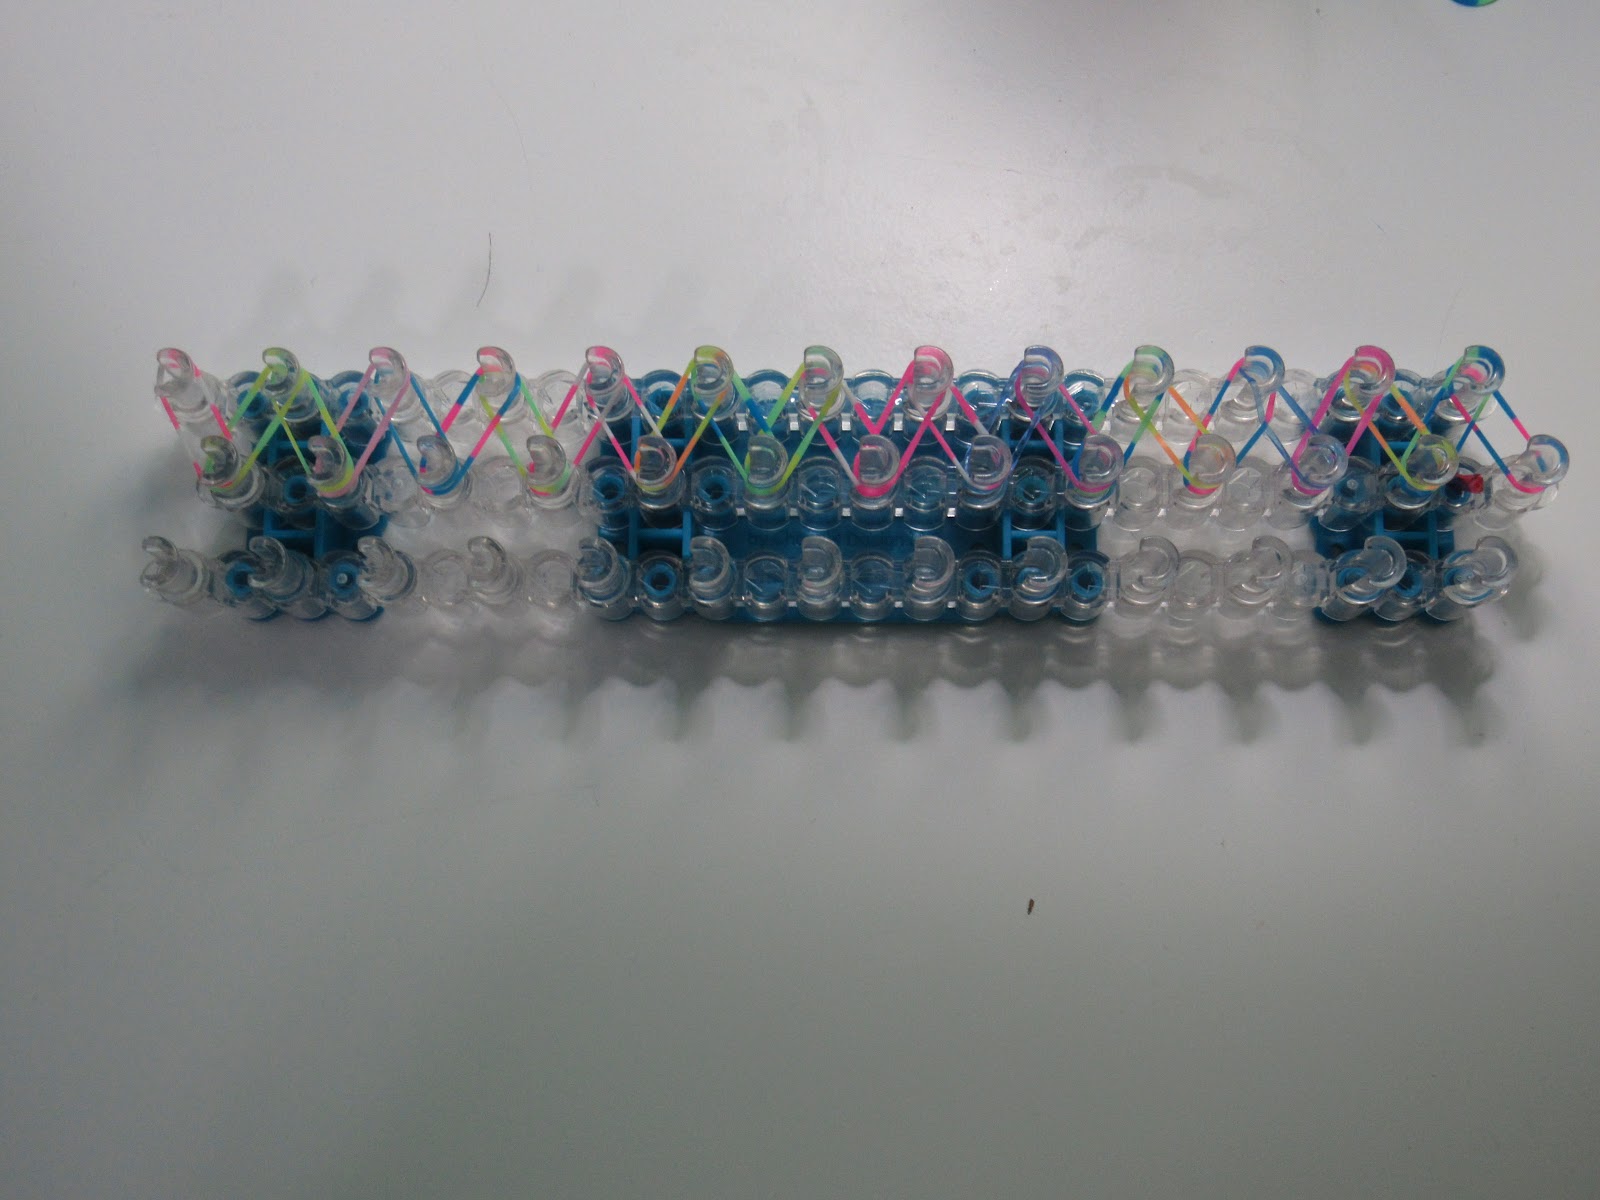
Once you are finished looming the whole thing, your loom should look like this.
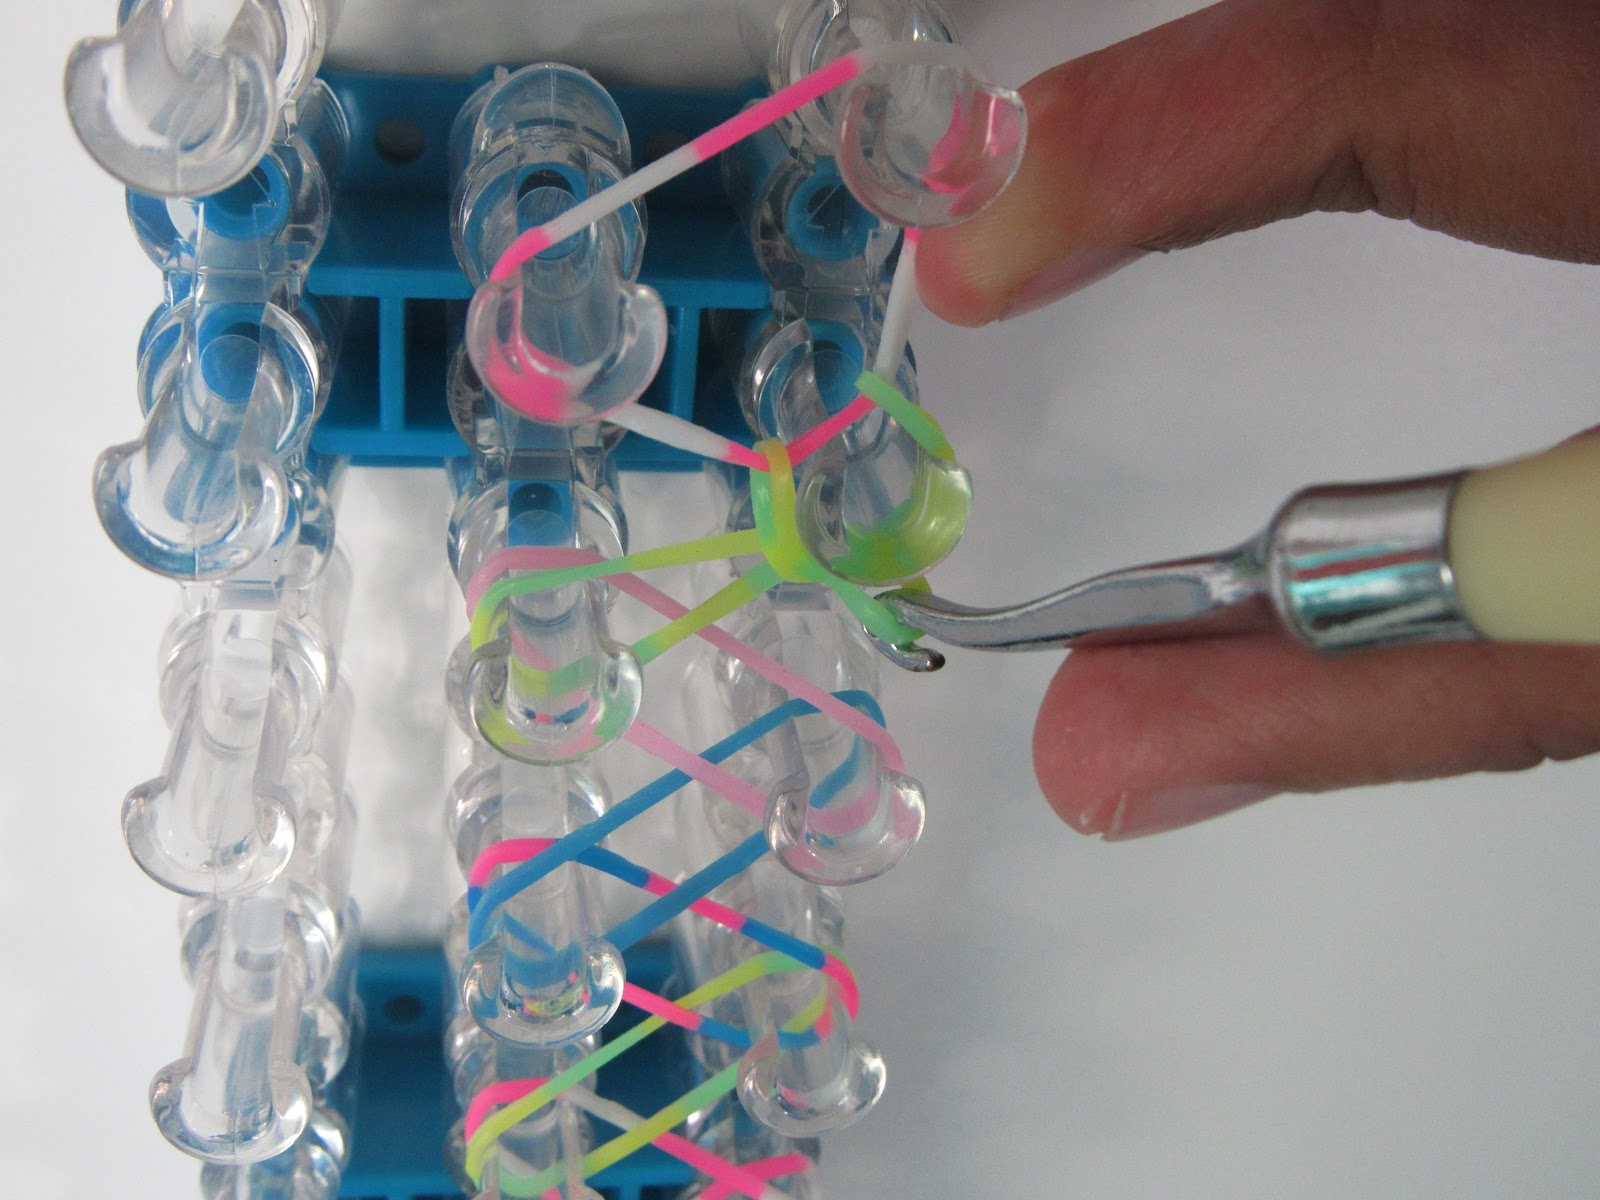
Turn your loom over so the red arrow is closest to you.
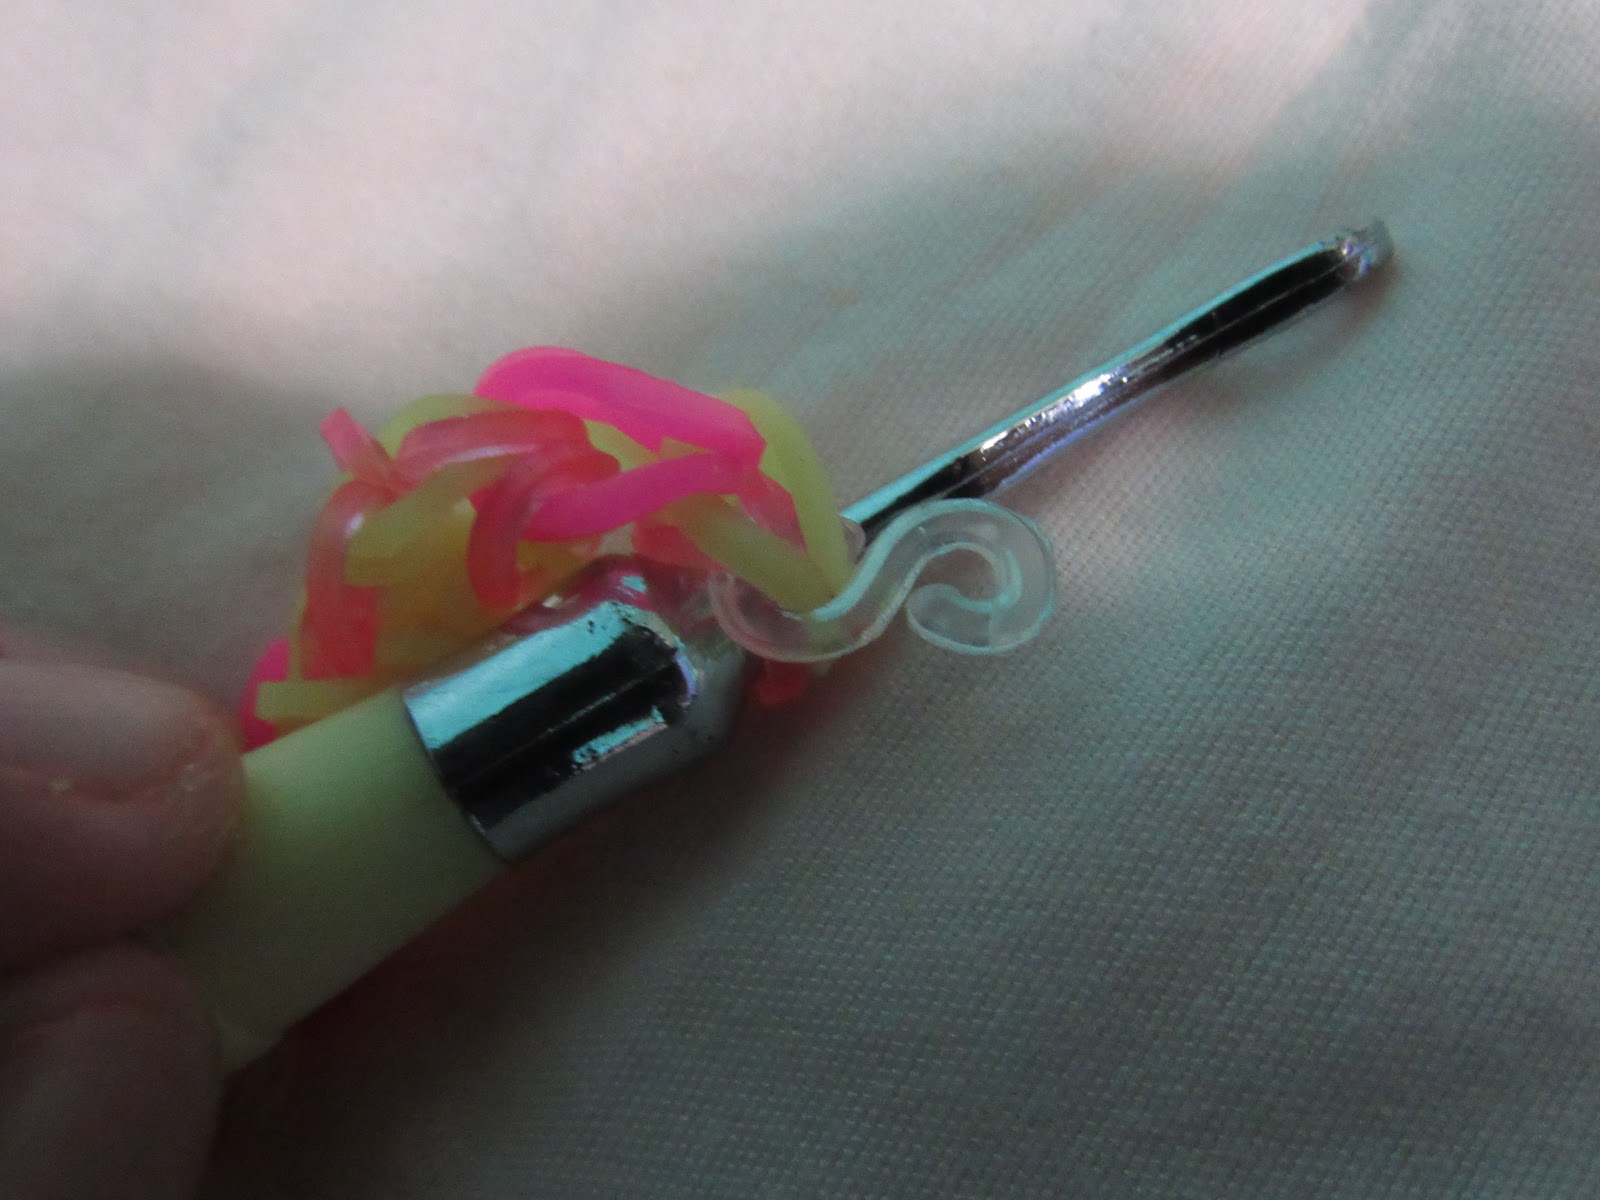
Stick your hook inside the bands at the end.
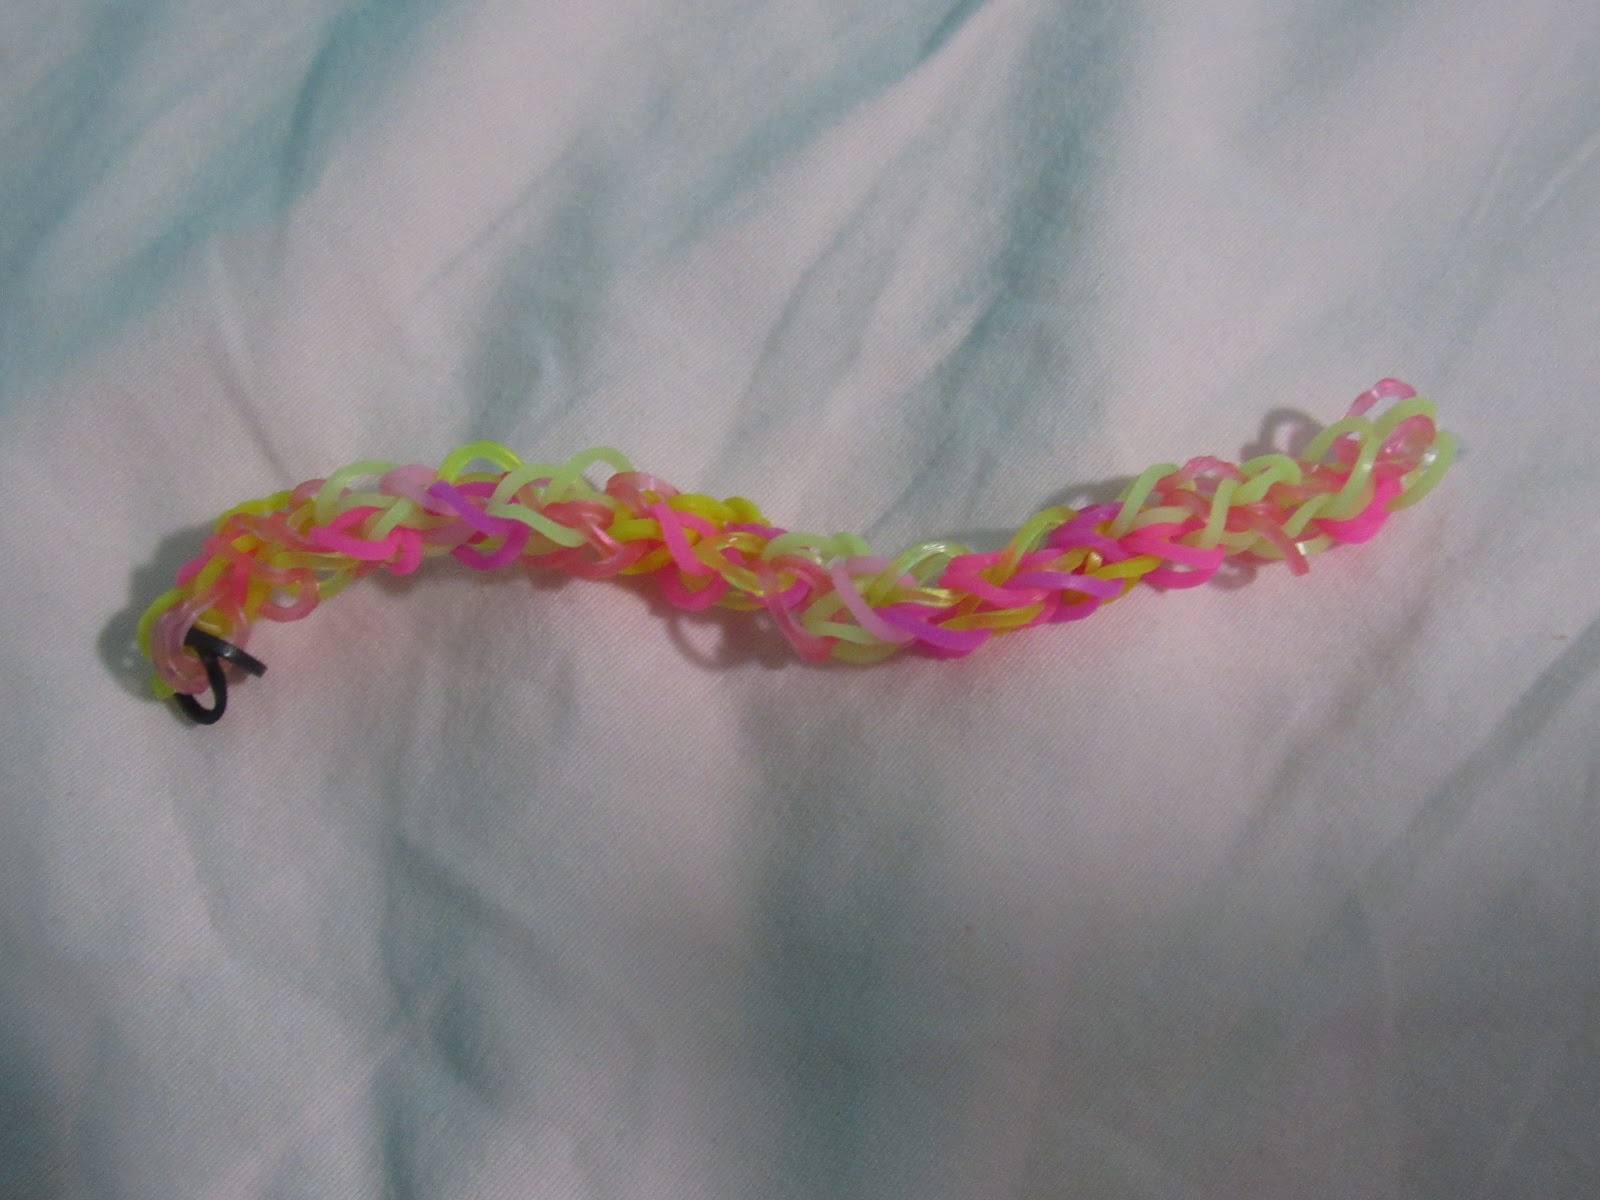
Start to carefully take it off the loom; afterward, it should look like this.
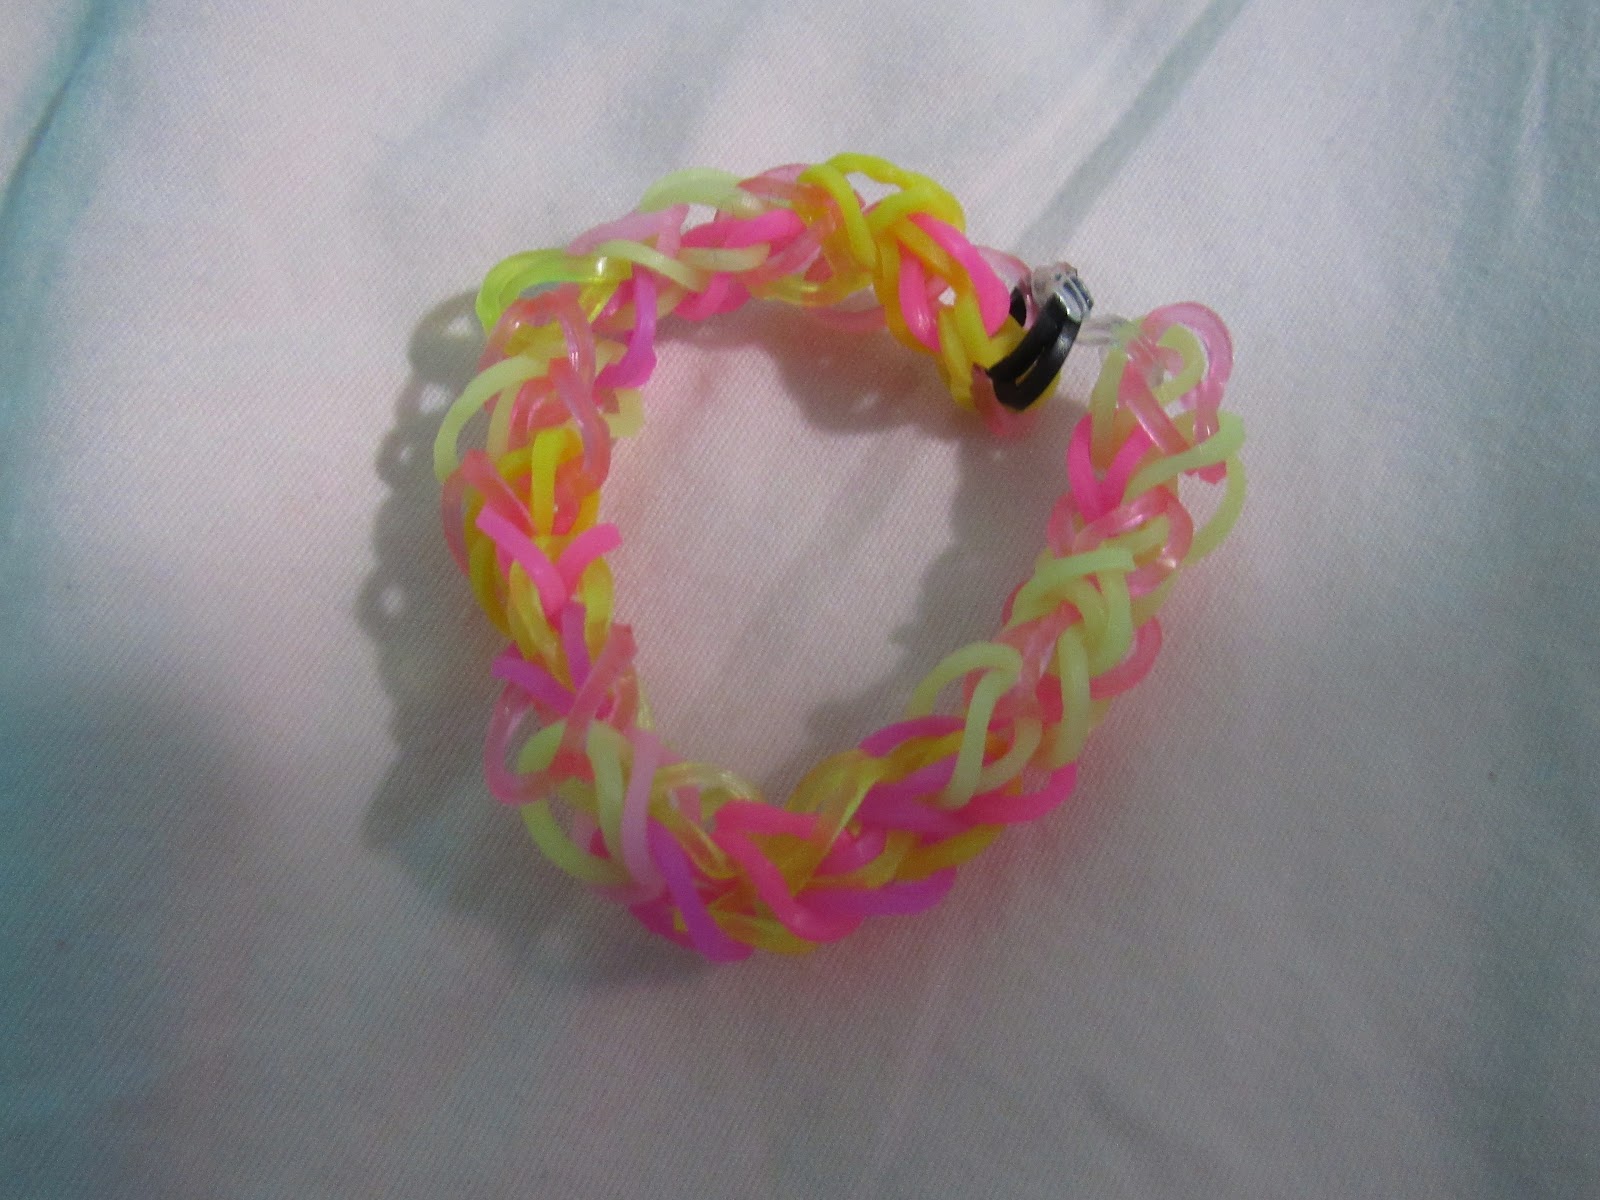
Lastly, attach a clip to the end and connect the bracelet.
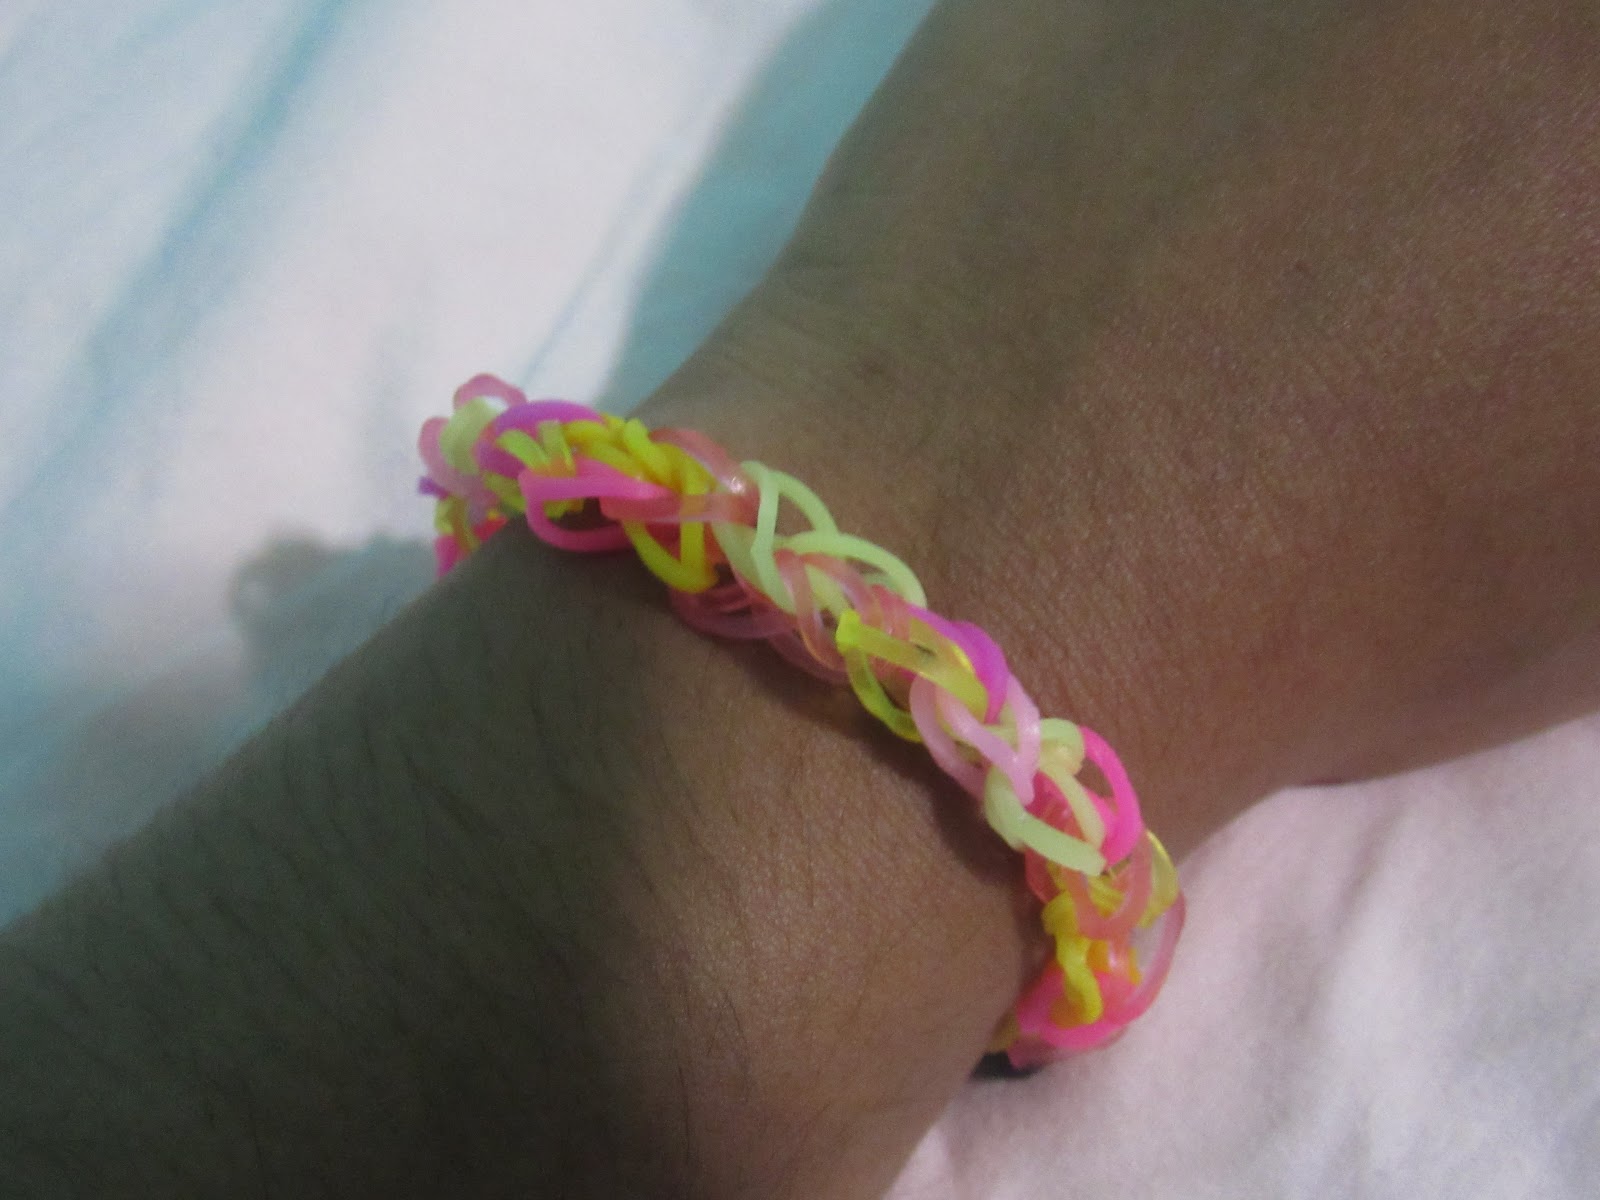
Nice work, you did it! If you are really interested in Rainbow Loom, there are many YouTubers that have tutorials on how to loom, too. I hope this was fun for you!
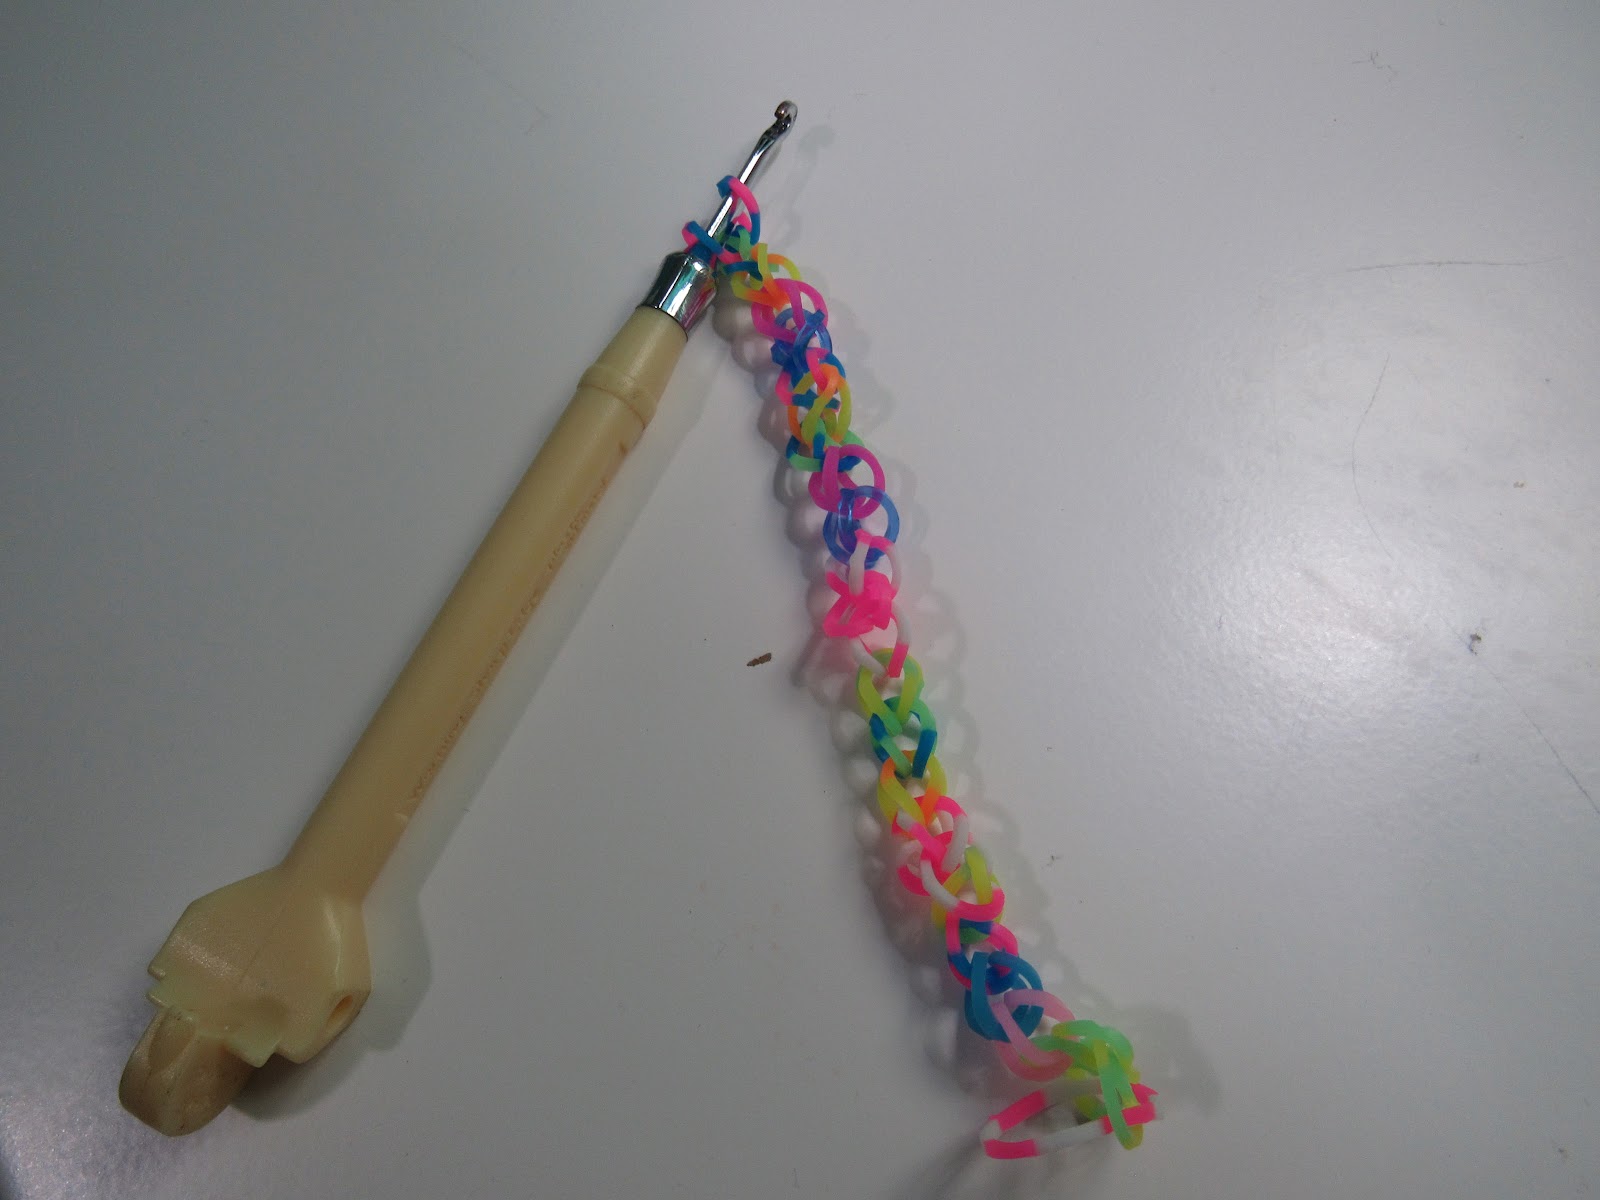
If you are in the mood for doing something crafty and creative, Rainbow Loom is just the thing for you! Well, you may be wondering what Rainbow Loom is. Rainbow Loom is a plastic peg board that comes with rubber bands, a hook, and some clips that connect your bracelet. The loom looks a little something like this.
Here is the hook that comes with it too! It will be used to connect bands. Now, if you are in the mood for making your first bracelet, you will definitely need some rubber bands. Don’t worry if you don’t have a loom or hook. This article will present a no hook and loom way of making this same bracelet with your fingers. If you do want the hook and loom, you can buy it on Amazon. The bracelet we are making is called the Single Chain bracelet, which is perfect for beginners! Let’s get started with the hook and loom way! First, lay your loom so the arrows point down like this.
Now we will start laying out the bands like this.
Continue in a zigzag pattern.
Now after you have continued that pattern through the loom, it should look like this.
It’s time to turn your loom around. We will now start using the hook!
So begin by putting your hook in that first band.
Now go forward into that peg and pick up that band.
Carefully take that band off the peg and put it on the next one.
Now do the same for the next peg. Go inside the bands, push forward to the peg, take the band of the peg, and put it on the next one.
Read the steps above again for help with doing the next pegs. Anyways, soon your loom should look like this, and it is time to take it off the loom.
At the very end of the loom, stick your hook into the two loops and then you can take the bracelet off the loom!
After you take it off, you may use a clip to connect the bracelet like this. (I will be using a s-clip). After you stick a clip through the loops, take the bracelet off the hook and connect the bracelet.
Yay you did it!
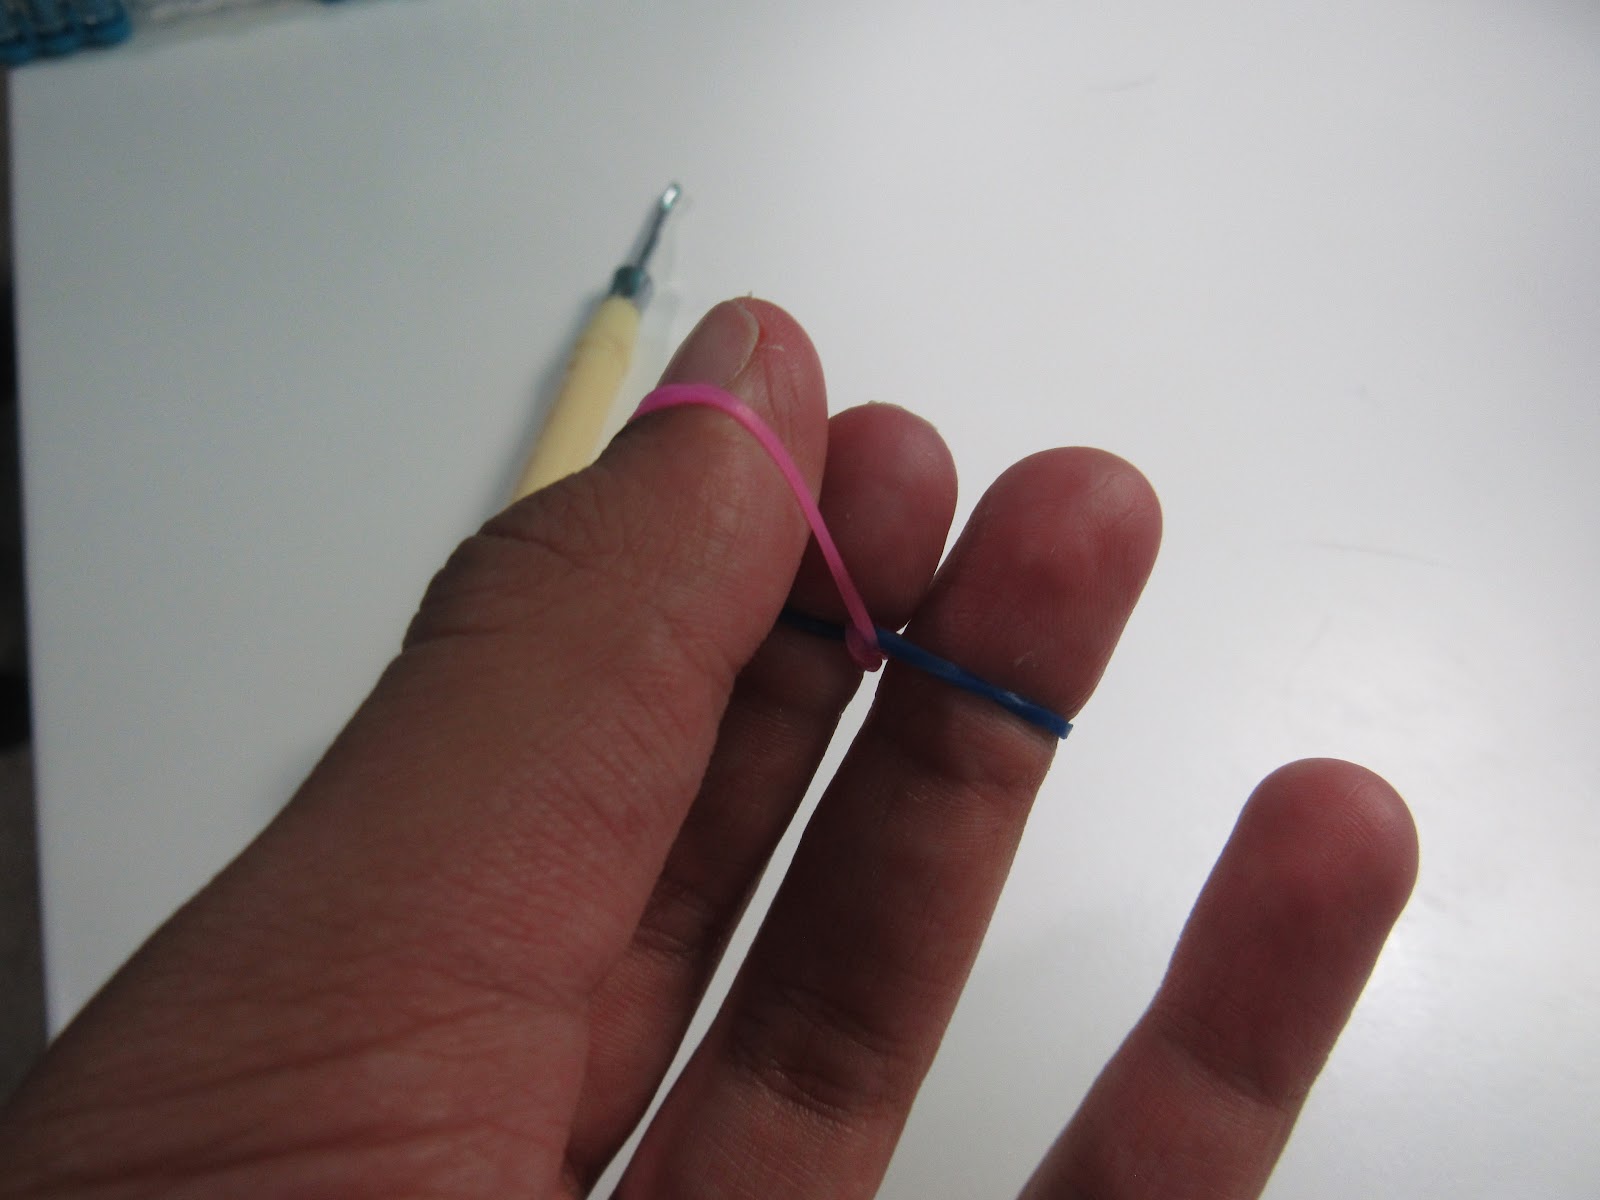
Now I am going to teach you how to use your fingers to do it!
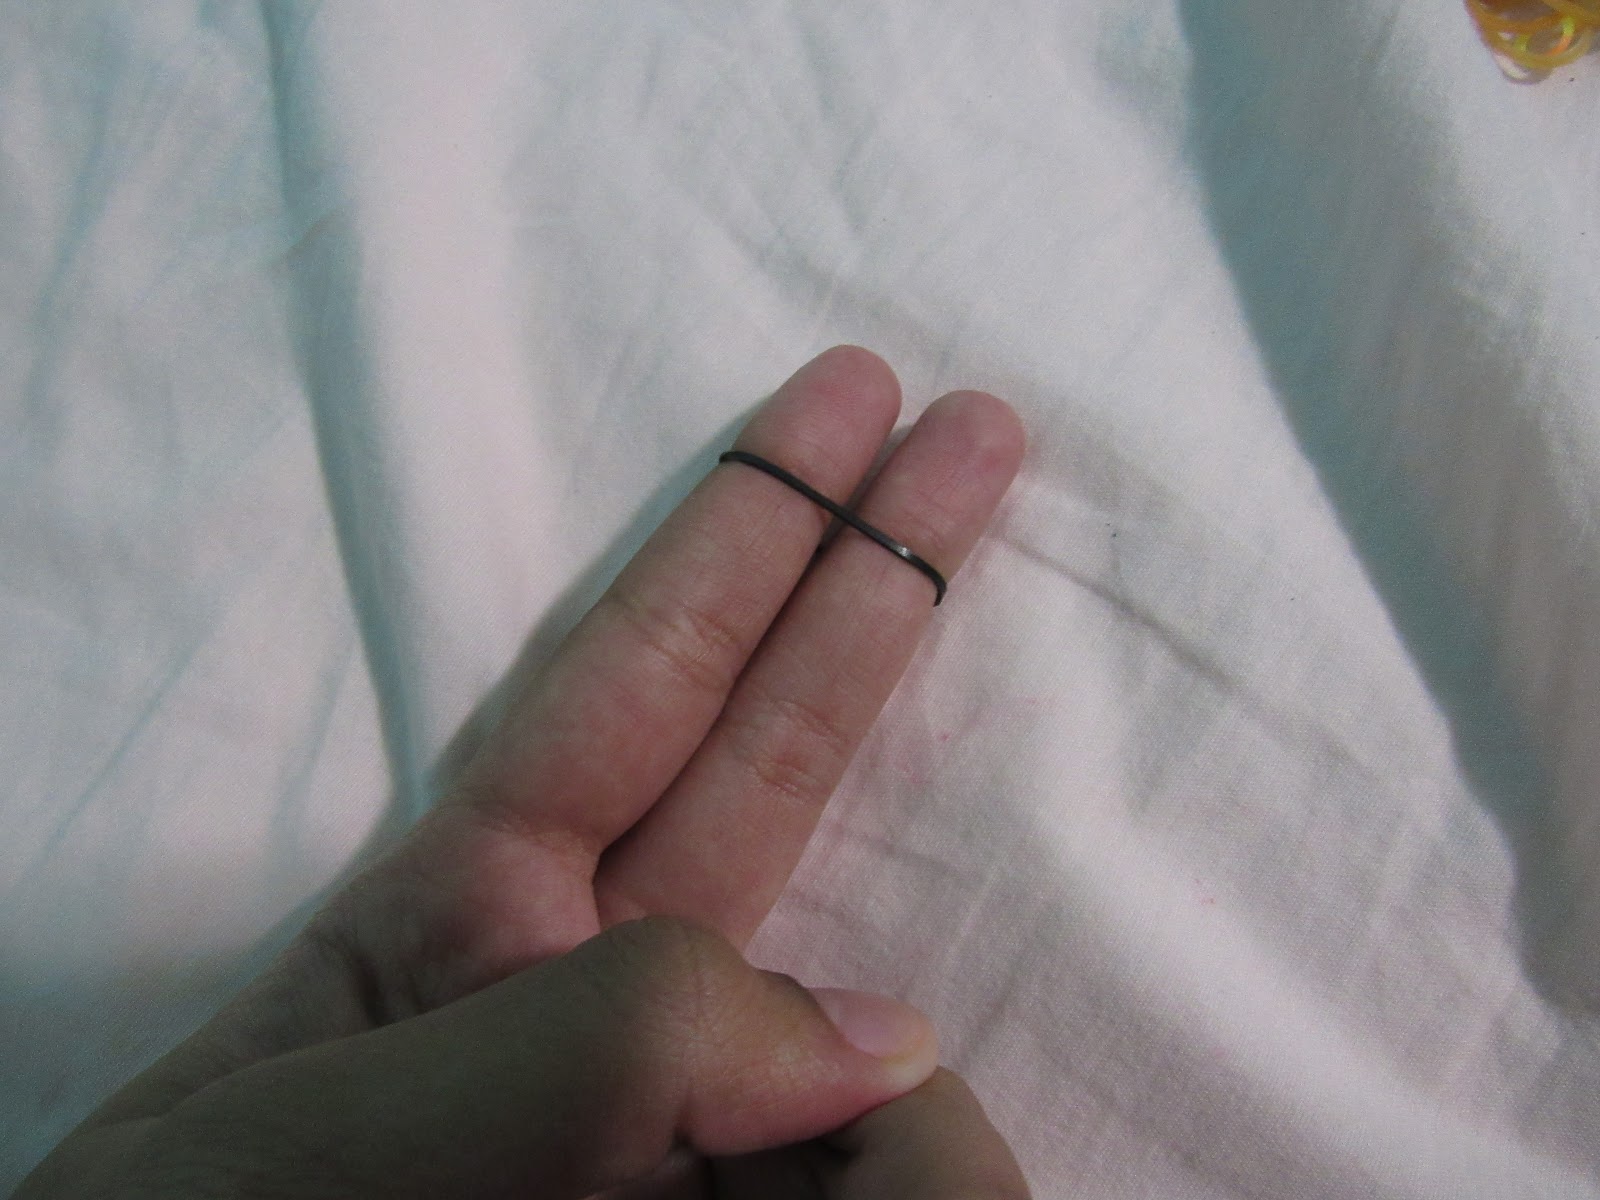
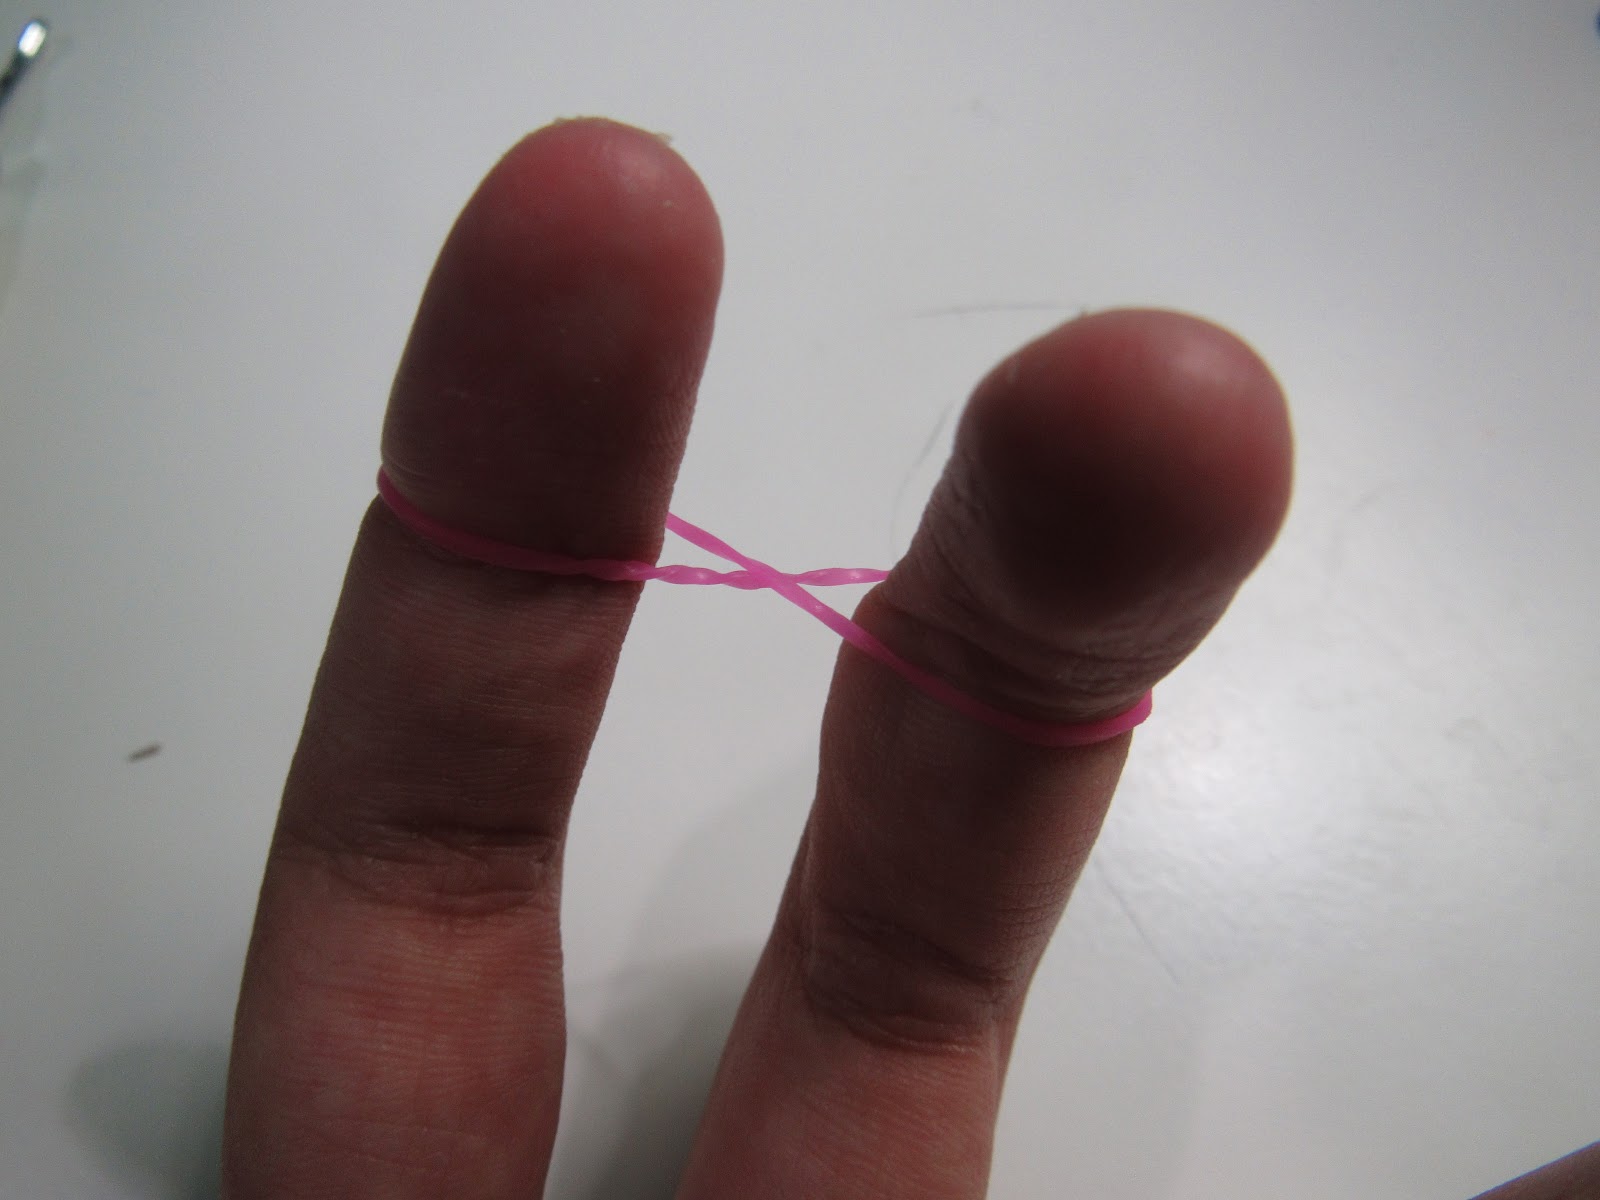
Start by putting a band on one finger and then twisting it and putting it on the other finger.
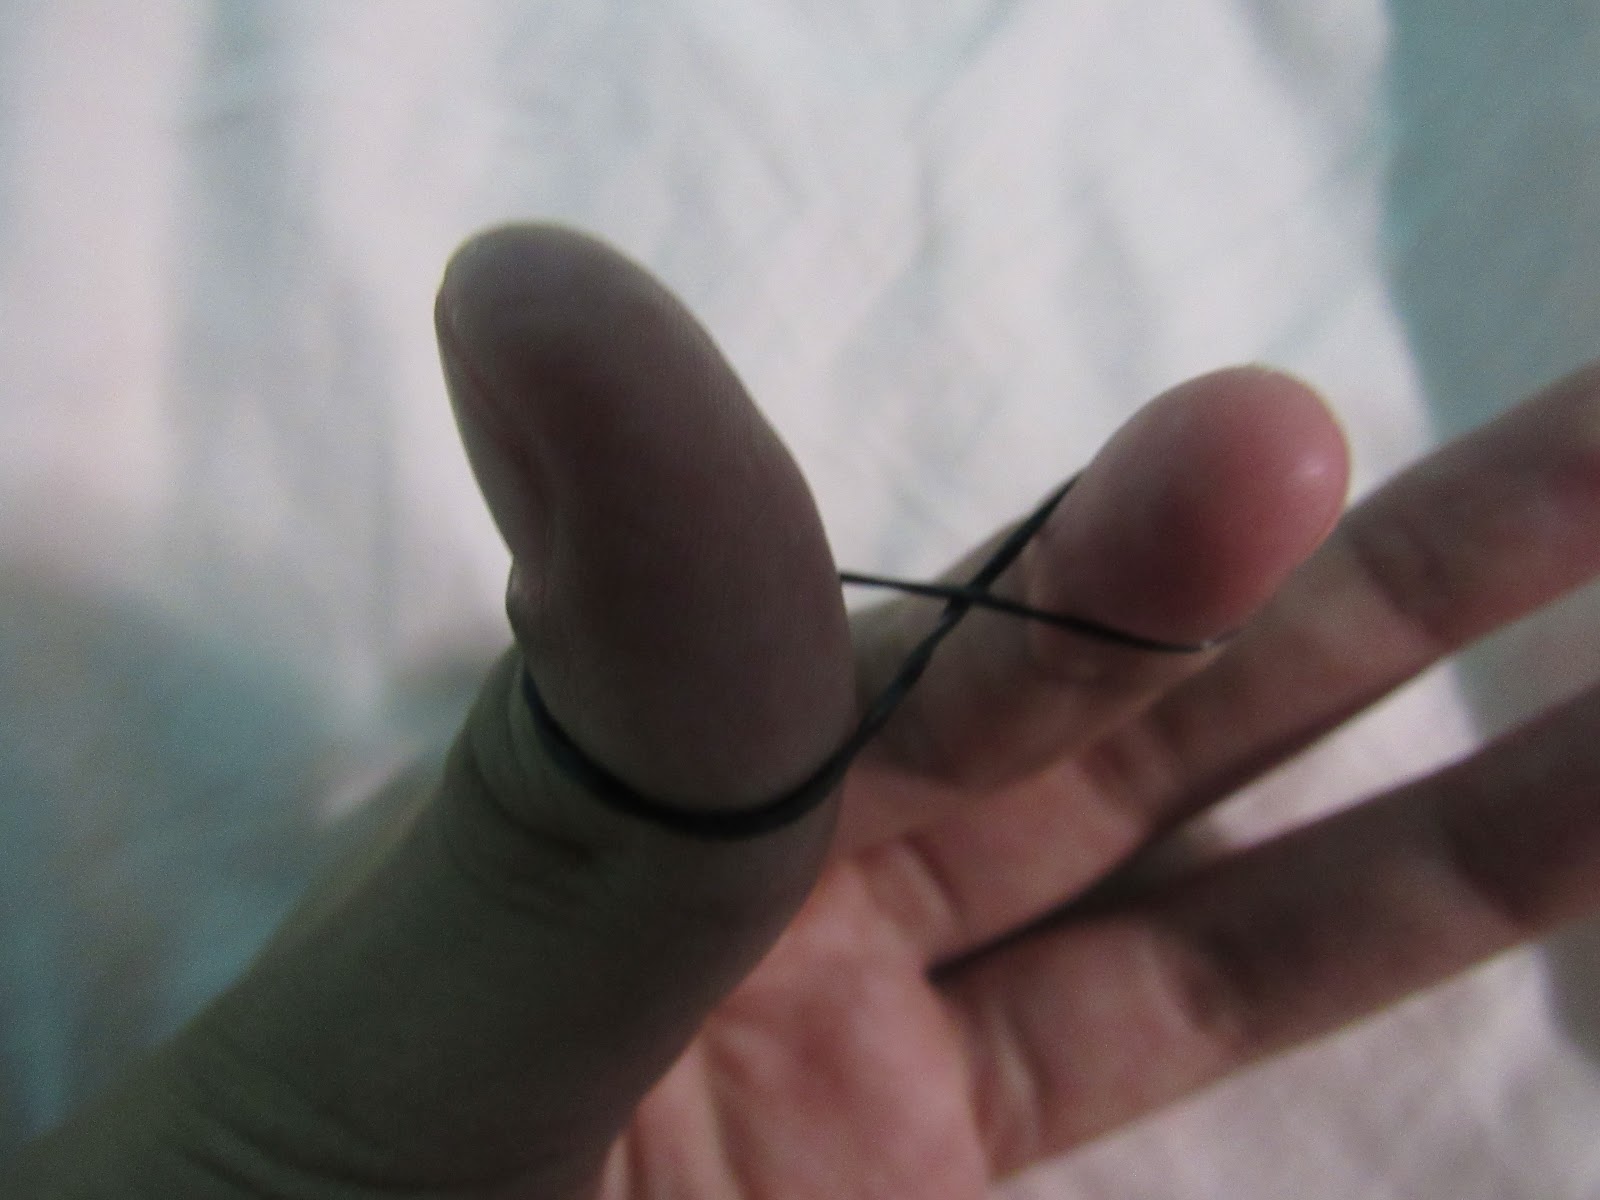
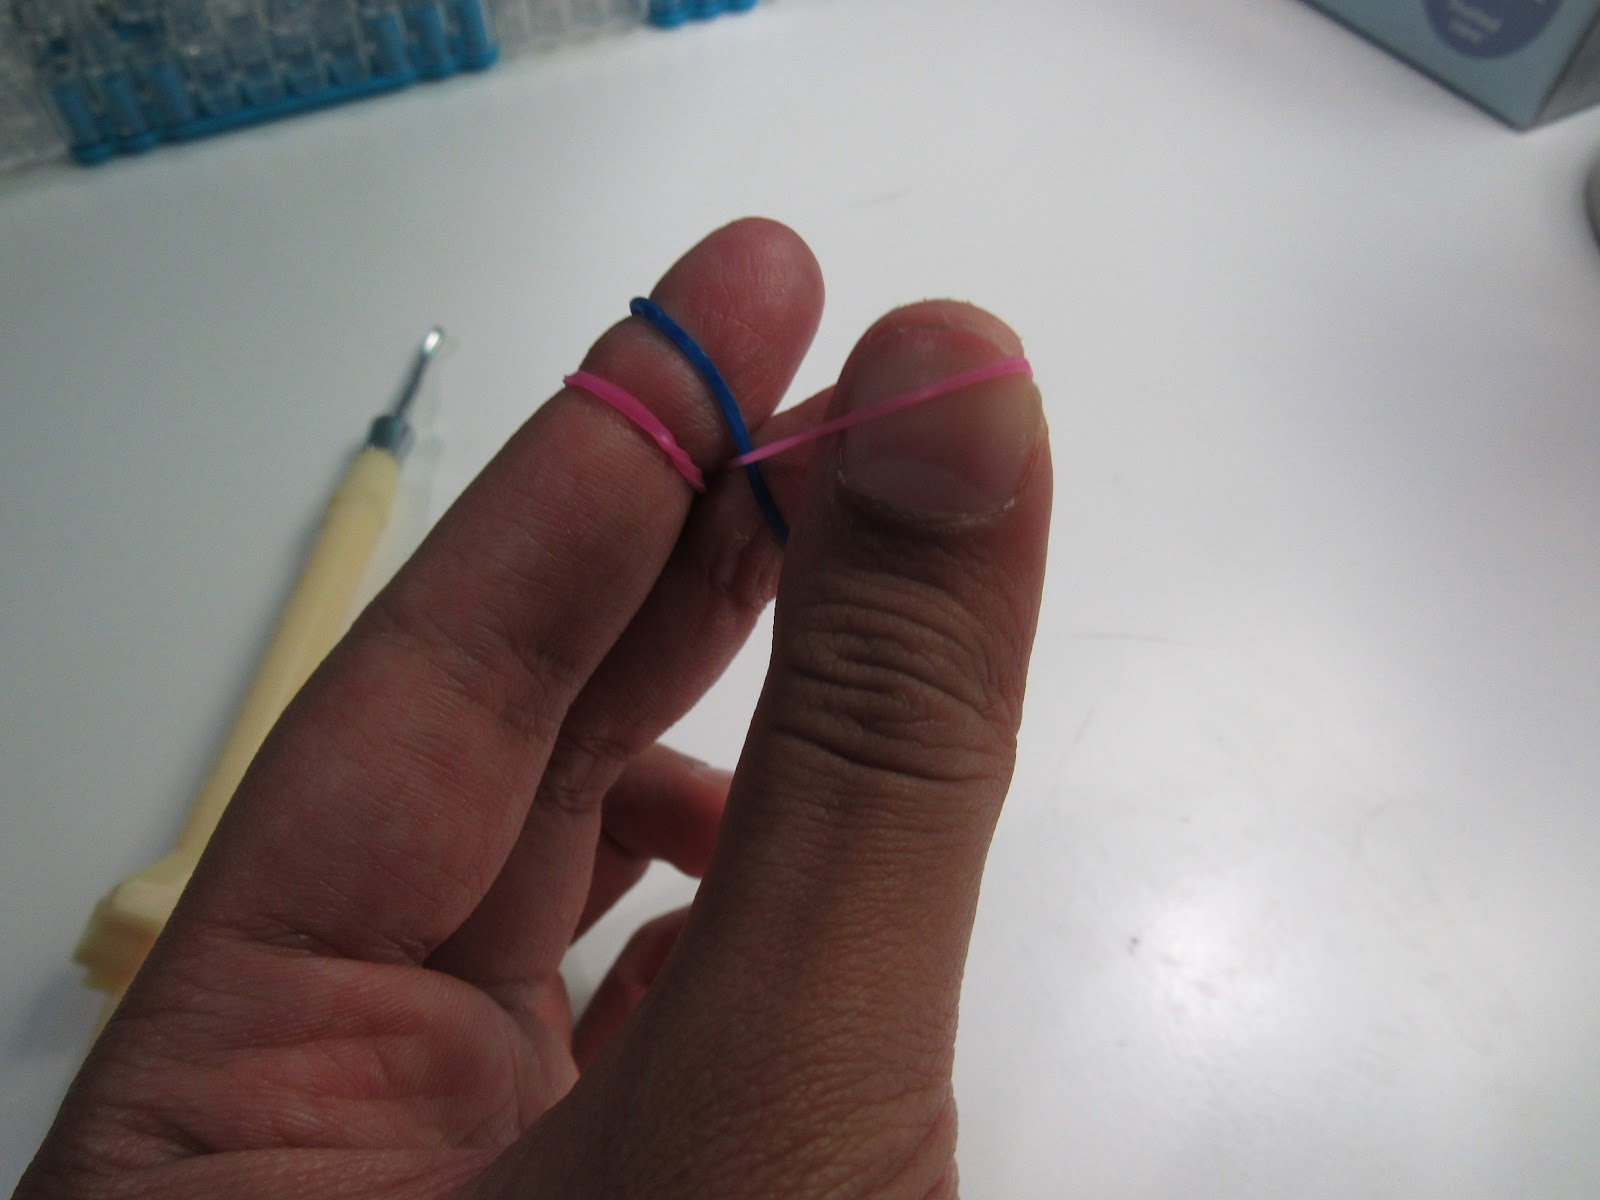
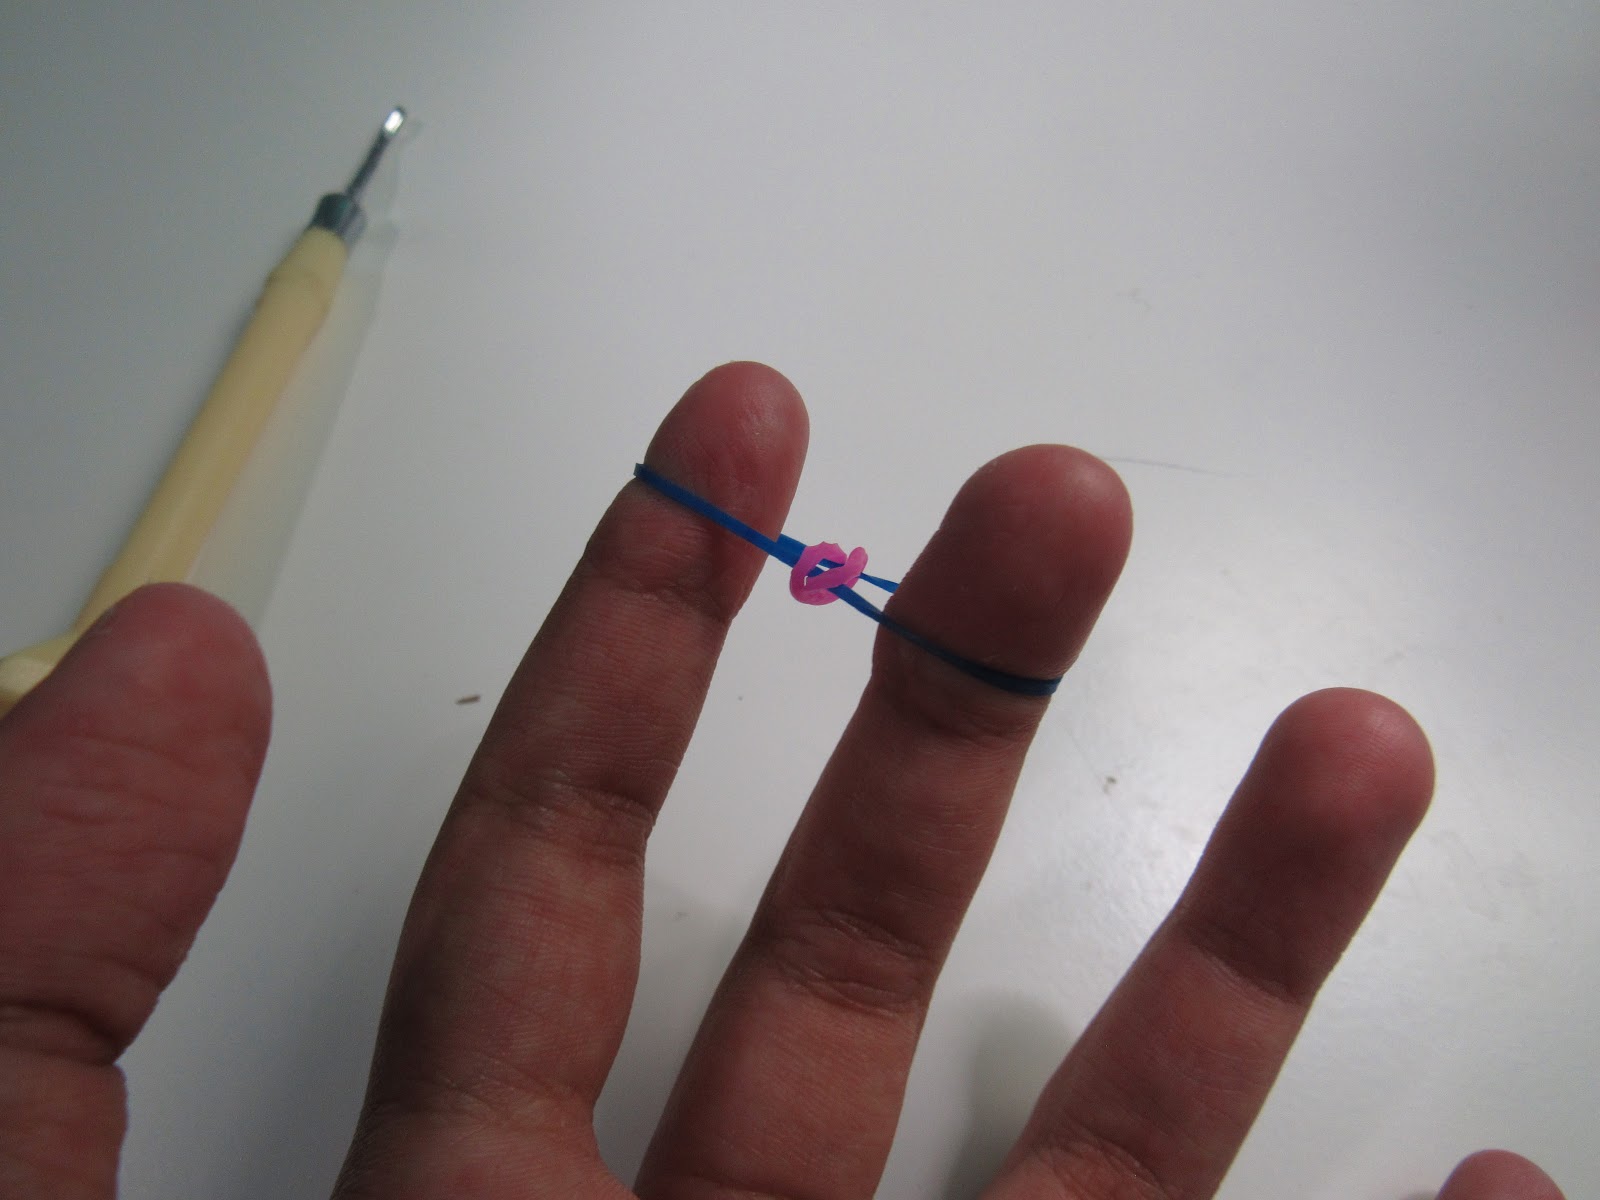
Next, put a band normally on the top.
Now take the bottom band of each side and flip it over like this.
Put another band on and repeat the previous step.
Put another band on and keep on following that pattern until it becomes long enough for your wrist!
Once it is long enough, make sure two bands are on and take the bottom band of each side and flip it over so one band remains.
Take a clip and put the loops in the clip.
Now connect the clip to the other side. You did it!!!
Was that fun? If it was, keep watch for more articles in the DIY Rainbow Loom series; we will be learning how to make more bracelets in the future. Thank you for reading ASOP!
During Covid, I’ve had a lot of time to experiment with different recipes, but my personal favorite has been my lemon bundt cake. Here’s the recipe for what I believe is the perfect Lemon Bundt Cake.
Ingredients:
1 box Lemon cake mix
1 box of instant vanilla pudding mix (3.4 ounces)
¾ cup oil
¾ cup water
½ cup sugar
½ cup sour cream
1 tablespoon lemon zest
3 tablespoons lemon juice
Frosting:
2 cups powdered sugar
8 ounce cream cheese
1 teaspoon lemon juice
1 tablespoon lemon zest
Instructions:
Preheat oven to 350° F.
In a large bowl mix all the ingredients together for 2 ½ minutes on high (I would personally add the zest and juice last). After, pour into a greased bundt pan.
Bake for 45-50 minutes (or until toothpick comes out clean). Let it cool for five minutes.
When finished cooking, put cooling rack on the cake and slowly flip it out of the bundt pan.
Frosting:
In a bowl mix all ingredients together and beat on high until creamy.
Put frosting in piping bag (or ziploc bag with corner cut off).
Put frosting onto the top of the cooled cake.
OPTIONAL: Add more lemon zest to cake to make it look fancy.
Now you’re done! I hope you enjoy this as much as I did, and I really hope it turns out!
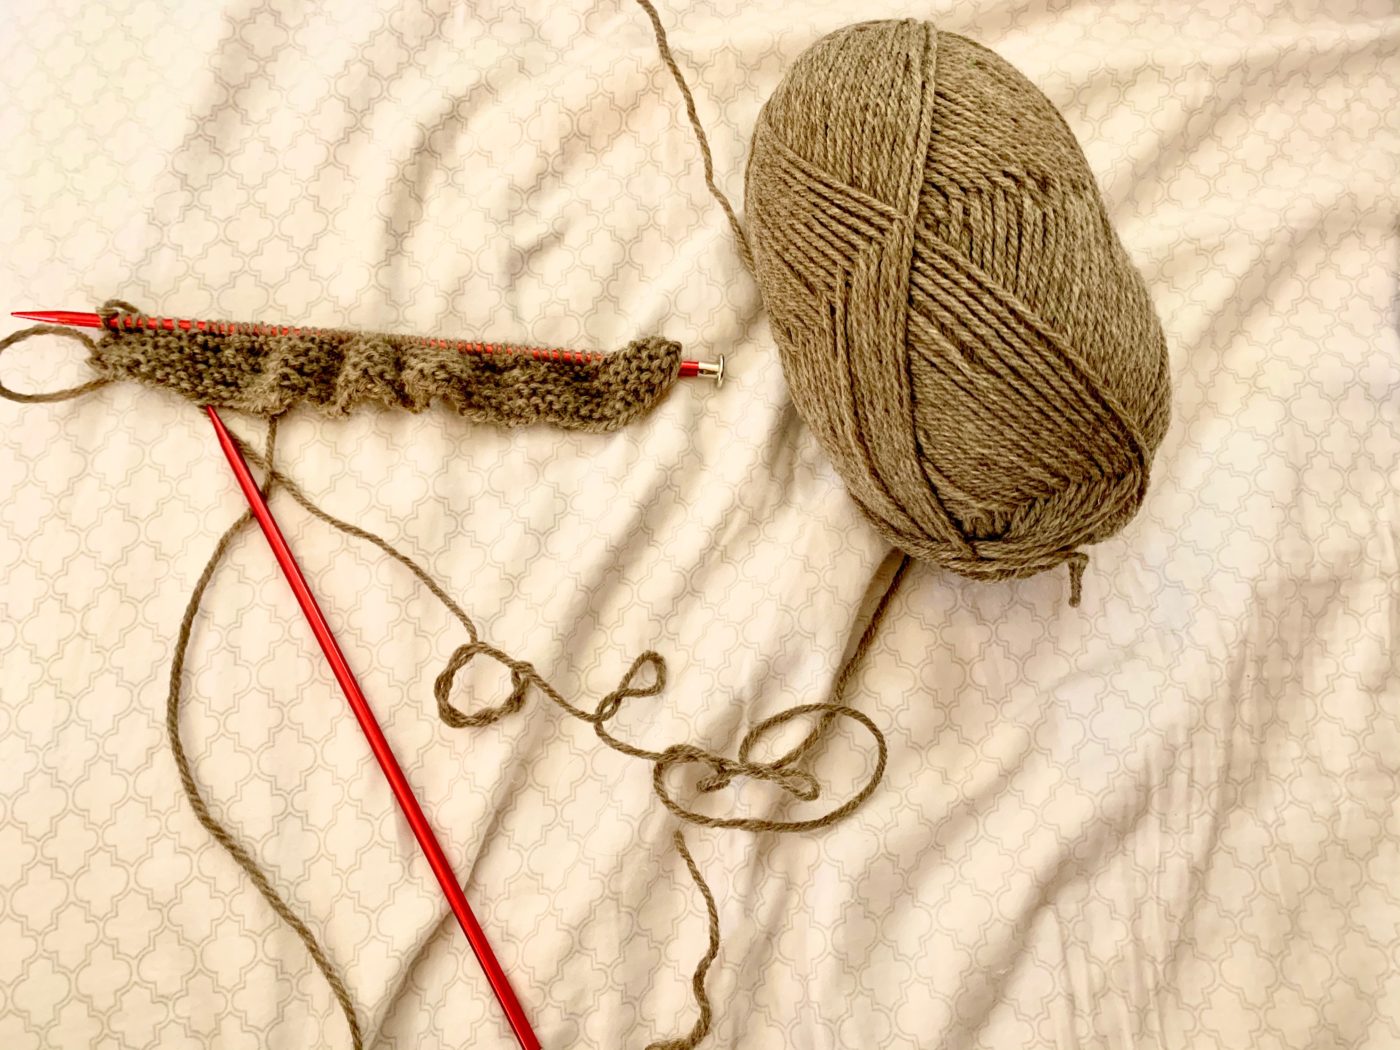
24.7 million acres burned, 25,000+ kangaroos, koalas, and other wildlife dead. The wildfires have created a national state of emergency in Australia. But how can we help from an ocean away? The MSA Yarn Society has been chipping in by knitting, sewing, and crocheting pouches for infant marsupials who have been rescued from the danger. I took up one of the projects myself, knitting a twelve by twelve centimeter wool pouch.
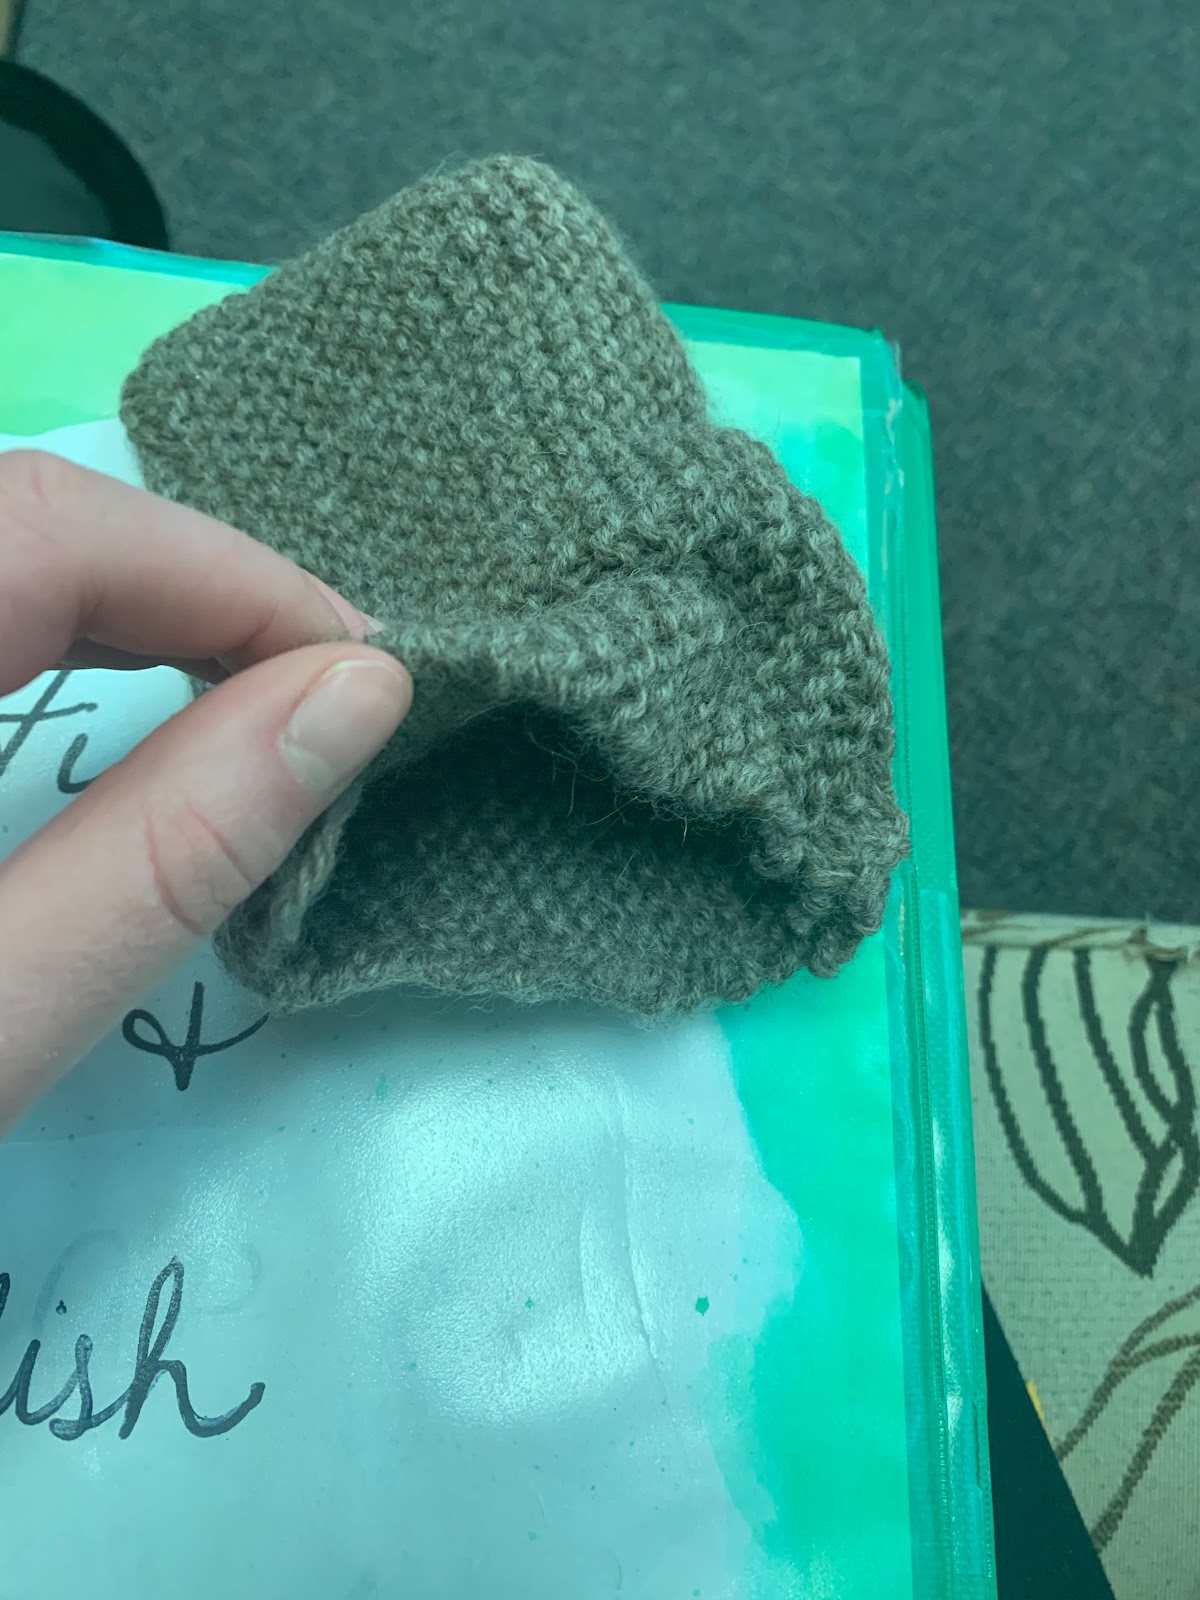
First, I started with 100% wool yarn. Anything mixed in with it could be harmful to the animals. I then casted on until the stitches were 24cm. in length. I then knit a standard garter stitch until the rows were 12 cm. long and casted off. After this, I folded the knitted sheet in half and stitched along the two sides, leaving the top open.
Voila! A perfect pouch for a sugar glider or a koala. But this isn’t all you can do. Talk to Mrs. Seeberger or join a session of Yarn Society, every Friday at 8:15 A.M., for more patterns and ideas!
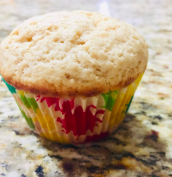
Fall is all about staying warm and comfy with your friends and family. Warm up on a crisp autumn day with this delicious recipe. This is a recipe for cinnamon muffins that everyone loves. These are easy to make, and you don’t need a whole lot of experience to bake them. This recipe makes 12 muffins; you should definitely give them a try.
Ingredients
1 ½ cups of all purpose flour
⅔ cup of granulated sugar
2 teaspoons of baking powder
2 teaspoons of cornstarch
½ teaspoon of salt
½ teaspoon of ground cinnamon
¼ teaspoon of ground nutmeg
1 egg
1 teaspoon of vanilla extract
½ cup of buttermilk
6 tablespoons of melted, unsalted butter
Cupcake liners
Muffin pan
Instructions
First, preheat your oven to 375 degrees Fahrenheit.
Second, add all purpose flour, sugar, baking powder, cornstarch, and salt into a large bowl
Add the ground cinnamon and the ground nutmeg into the same bowl.
Use a spoon to stir the dry ingredients, so they are well combined.
Add one egg into a medium sized bowl. Then, use a fork to lightly whisk the egg.
Add the vanilla extract into the bowl.
Next, add the buttermilk. When you add the buttermilk, it should be about room temperature.
Add the butter into the mixture as well. This butter shouldn’t be burning hot when added to the bowl, it should be a little cooler.
Use a spoon to mix the wet ingredients together.
Now, pour the wet ingredients into the dry ingredients.
Use a rubber spatula to mix everything together. It is very important not to overmix your batter so be very gentle and slow when doing this.
Line your muffin pan with cupcake liners.
Then, fill each muffin liner ¾ way with the batter.
Finally, bake these muffins in the preheated oven for about 13 minutes.
After they are done baking, take them out to cool before you try them.
These cinnamon muffins are so much fun to make around this time of year! Share the muffins and the recipe with your friends and family. These also make a great dessert for Thanksgiving. I hope you try these out and enjoy the final result.